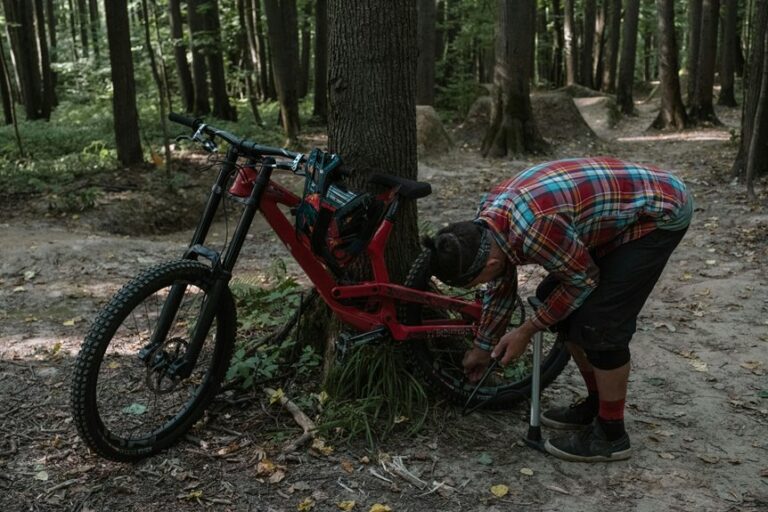
A smart tail light works best with a careful setup angle. Point it straight back so drivers see your bike clearly. Keep it level with the road for steady visibility. Make small adjustments for bumps, bags, and wet weather.
Choose the Right Tail Light Angle
To get the best from your smart bike tail light, start with the angle, because even a powerful light can miss the mark whenever it points the wrong way. You want the beam to sit where drivers can catch it fast, not where it shines into empty space. A slight rearward tilt helps your reactive sensors read speed changes clearly, while radar awareness works better whenever the light stays easy to notice.
Mount it on the seatpost, then check how it looks from a car’s view. In the case that you ride with a group, test the glow at a calm pace and adjust until it feels right. Small changes matter, and they help you fit in with riders who care about being seen.
Keep Your Tail Light Level
Once you’ve set the angle, keep your tail light level so its beam stays steady and easy to read. A level mounting helps you stay visible because the light won’t drift upward or sink toward the pavement as you ride.
You want steady alignment, especially whenever you hit bumps, corners, or quick stops. Check the light from behind, and make sure it points straight back without tilting left or right.
Whenever your bike has a seatpost shape or rack that shifts, tighten the mount until it feels firm. Then ride a short stretch and look for any wobble.
That small check helps your group spot you faster and keeps your setup feeling confident, neat, and ready for the road.
Match Tail Light Height to Your Bike
Because bike frames, racks, and seatposts all sit at different heights, your tail light needs to match your bike so it stays easy to see without sitting too low or too high. You want the mount height to follow your bike fit, so the light lines up with the rear shape instead of hiding behind bags or saddles.
When you ride a tall frame, place it higher on the seatpost or rack. When your bike sits low, keep it raised enough to clear wheels and fenders. Check that the light stays centered, steady, and free from wobble. Then, step back and look at it from behind.
Whenever the height feels right, your setup looks cleaner, works better, and helps you feel like you belong on every ride.
Aim It for Traffic, Not Riders
Aim your rear light for the people who need to see you from behind, not for the riders right on your wheel. You want traffic awareness, so angle the beam to meet drivers’ eyes at a distance, where vehicle detection matters most.
Keep the light centered on the lane space behind you, and let side glow spill a little for turning cars and parked doors. When your light has flash modes, choose one that grabs attention without looking wild. A steady pulse can help cars spot your shape faster.
You’re not trying to flatter the pack behind you; you’re trying to belong on the road with clear signals. Small tweaks make a big difference, and a clean aim helps everyone read you sooner.
Adjust for Hills and Descents
Hills and descents change everything, so your rear light needs a little extra thought before you roll out.
When you climb, your bike tilts back, and the beam can point too high. Give it hill gradient compensation via angling the light a touch lower than you’d on flat roads.
On descents, your rear end drops, so check descent visibility tuning and keep the beam broad and steady for people behind you.
If you ride rolling routes, make small test stops and watch how the light lands on the road.
That quick check helps you feel safer and stay seen as a group, not just as a lone rider.
In hilly country, small tweaks go a long way, and they keep your tail light working with the terrain.
Reduce Glare From Your Tail Light
You can cut tail light glare by tilting the beam just low enough to stay clear without losing rear visibility.
A diffused output helps soften the light, so you still stand out without blasting the rider behind you.
If you aim it below eye level, you make the road safer and a lot more comfortable for everyone back there.
Optimize Light Angle
Why does a tail light sometimes feel too bright, even while it’s doing its job? You can fix that by tilting it so the beam lands lower and wider, not straight into another rider’s eyes. That small shift keeps your group comfortable and helps radar awareness and motion sensing work without distraction.
| Check | Action | Result |
|---|---|---|
| Seatpost mount | Angle slightly down | Softer glare |
| Rear rack | Center the beam | Better balance |
| Road curves | Aim wider | Safer edges |
| Traffic mix | Test at dusk | Clearer notice |
| Group rides | Recheck after bumps | Fewer complaints |
When you match the angle to your bike and ride style, you protect your friends behind you and stay easy to spot. A quick twist can make your tail light feel less bossy and more welcome on the road.
Use Diffused Output
After getting the angle right, the next move is to soften the light itself so it feels clear without feeling harsh. You want a diffused output pattern that spreads red light across the road instead of firing one bright point into someone’s eyes. That wider glow helps drivers notice you sooner, and it also keeps your ride feeling calm and considerate.
Should your tail light have a diffuser, use it. Should it not, choose a mode that blends the beam and reduces sharp edges. You’ll still keep strong side spill visibility, which matters as cars approach from angles or as you move through busy intersections.
In a group ride, that softer look helps you fit in without fading out. People see you, and they don’t flinch.
Aim Below Eye Level
A small downward tilt can make a big difference, because a tail light that sits below eye level feels safer for everyone around you.
You help other riders, drivers, and walkers relax once your beam stays out of their direct line of sight. For night glare control, point the light toward the road behind you, not straight back into faces. That small change supports eye line safety and still keeps you easy to spot.
If your light has several modes, test them after dusk and choose the one that stays clear without feeling harsh. You can also check your setup from a friend’s view to see what they notice.
Once the angle is right, your group rides smoother, and your light works with the scene, not against it.
Use Flash Mode for Day Visibility
During you ride in daylight, flash mode can make your smart bike tail light stand out fast, even in busy traffic. You get a strong daytime flash that cuts through sun glare and quick-moving cars.
Choose a fast, clear pattern, because a blinking red light often grabs more eyes than a steady glow. That little attention lift can help drivers notice you sooner and give you more room.
Keep the flash bright enough for city streets, but not so wild that it feels chaotic. Whenever your light offers multiple settings, test them on your usual route and pick the one that feels calm, confident, and easy to spot.
Then you can roll with the group and feel seen.
Mount It Securely on Bags
When you mount your smart bike tail light on a bag, you need to give it the same care you’d give a seatpost setup. Start by checking bag attachment security so the light won’t twist on rough roads. Choose a flat spot on the bag, then use firm straps or a clip that won’t slip whenever the bag shifts.
Next, consider pannier strap placement, because straps can block the beam or press the light into awkward angles. Keep the lens clear, and test the bag with a light load initially. If the bag flexes, tighten it again before you ride. You’ll feel better understanding your light stays steady, and your group will notice you more easily too. Small checks now can save you from a wobbly, dim surprise later.
Position It for Bikepacking Loads
When you pack for bikepacking, your tail light can shift because the load changes how your bike sits and moves.
You’ll want to angle it so the beam stays clear even though a rack bag blocks part of the rear.
A small adjustment now can keep your light visible as the trail gets rough and your gear starts swaying.
Load-Shifted Light Angle
As soon as you strap bags onto a bikepacking rig, your rear light can shift out of its best line of sight, so you need to place it with the load in mind. You ride better as soon as the beam stays calm through adaptive load shift and still matches your braking response angle.
| Load change | Best tilt | Why it helps |
|---|---|---|
| Light day bag | Slight up | Keeps the beam level |
| Full saddle pack | Neutral | Holds rear visibility steady |
| Heavy camping load | Tiny down | Stops glare on rough roads |
Check the light after you pack, then sit on the bike and watch the beam. As soon as it dips, raise it a touch. As soon as it climbs, lower it. That small tweak helps your group feel seen, which matters on long, shared rides.
Rack Pack Obstruction
Your beam can stay true on a clean bike, but bikepacking racks can throw it off fast. Whenever you load a rear rack, you need to check rack obstruction before you ride.
Bags, straps, and dry sacks can block the tail light or cut its spread. So mount the light higher on the seatpost, or move it to a side spot with pack clearance.
Then step back and watch the beam from behind, not just straight on. You want the red flash to clear the pannier edge and stay easy to spot in rain, dust, and night traffic.
Whenever your load shifts, recheck the angle after every stop. That small habit keeps your crew riding visible and confident together.
Check Visibility From Far Away
How do you know whether your smart bike tail light can still be seen from far away? You check distance visibility before you trust the road. Stand back and look for a crisp red point, then confirm the beam still reads clearly as traffic, trees, or weather crowd the view. Your setup should support radar range too, so drivers and riders notice you beforehand.
- Aim the light so it spreads wide, not just bright.
- Keep it high enough to stay above bags or racks.
- Pick a flash pattern that stands out at a glance.
- Ask a friend to spot you from across a block.
At the time you do this, you join the safer pack and make space for everyone behind you.
Test the Setup on Night Rides
Take the light out on a real night ride before you trust it in traffic, because dark roads reveal problems that a driveway test can hide. You’ll notice how your tail light behaves over bumps, turns, and quick stops. Use night ride testing to check whether the beam stays easy to spot from behind and from the side.
Ride with friends if you can, then ask them for visibility verification at different distances. Try steady and flashing modes, and see which one feels clearer on your usual route.
Also, compare the light’s glow under streetlamps and in open dark spots. Whenever you do this, you join the riders who tune gear with care, confidence, and a little self-esteem.
Fix Loose or Crooked Mounts
If your tail light looks crooked, start with tightening the mount hardware so it sits firm again.
Next, line up the light so it points straight and stays clear from side to side.
Then check the strap tension, because a snug fit keeps the mount from slipping on bumpy rides.
Tighten Mount Hardware
As soon as the tail light sits a little crooked, your smart setup can feel off, but the fix is usually simple and worth the few extra minutes. You belong on the road with gear that stays steady, so check the mount hardware first.
Use the right hardware torque, because overtightening can crack plastic, while loose parts invite wobble. Add a bit of vibration damping with a rubber washer or pad so bumps don’t shake the light free.
- Hold the mount still as you tighten.
- Stop once the clamp feels snug, not crushed.
- Recheck after your initial ride.
- Replace worn screws or straps fast.
With solid hardware, your light stays secure, and you can ride with more calm and trust.
Align Tail Light
Straighten the tail light now so your smart setup does what it’s supposed to do. You don’t need a perfect workshop, just a steady eye and a few small tweaks.
When the mount sits crooked, your rear beam can drift off center and hide you from drivers. Gently rotate the light until it faces straight back, then check that the body sits level with the bike.
This helps radar detection stay aligned with traffic behind you, and it lets ambient sensors read light changes more cleanly. Next, look from a few steps back and make sure the glow looks even, not twisted.
A square, centered light feels cleaner, and it gives your group ride a safer, more confident look.
Check Strap Tension
A loose strap can throw your tail light off in a hurry, so check the tension before you head out. You want the light to sit firm, but not so tight that it twists the mount.
Once strap tension feels right, your bike buddy behind you gets a steady red signal and you feel more confident on the road.
- Press the strap with one finger.
- Look for a snug, even wrap.
- Shift the light and test mounting security.
- Recheck after a short ride, since vibration can loosen it.
If the light leans left or right, loosen it, center it, and try again.
A secure fit keeps your setup calm, clean, and ready for the next ride with your group.
Improve Visibility in Rain and Fog
As rain or fog rolls in, your smart tail light has to work harder, so setup matters more than usual. You want the beam aimed a bit wider and slightly lower, so wet pavement catches the light instead of scattering it. That helps with rain penetration and fog scattering, and it keeps you easier to spot from behind.
Choose a strong flash or reactive mode, since steady glow can fade in mist. Then make sure the light sits cleanly on your seatpost or rear frame, with no bag or jacket blocking it. Whenever your bike has side LEDs or a wraparound design, use them.
Together, you’ll build a rear signal that feels clear, calm, and reliable when the weather gets messy.
Recheck the Angle After Every Ride
After every ride, you should check that your tail light still sits straight and hasn’t shifted on the seatpost or rear mount. A rough road can nudge the angle a little, so take a second to reaim it toward traffic and keep that rear glow doing its job.
It’s a small habit, but it can save you from riding with a light that’s pointing at the sky like it’s trying to spot planes.
Inspect Mount Alignment
Whenever you check your smart bike tail light’s mount after every ride, you catch small shifts before they turn into weak visibility or a crooked beam. You stay part of a safer ride team whenever you treat this as a quick habit, not a chore. Start with mount stability, then do a careful bracket inspection.
- Hold the light and feel for wobble.
- Tighten the clamp until it sits firm.
- Confirm the beam still points straight back.
- Look for cracks, dirt, or twist marks.
If the light sits slightly off, loosen it, reset it, and test it again. A steady mount helps your rear light stay clear to drivers, and that gives you more confidence every time you roll out together.
Check After Rough Rides
Rough roads can nudge your smart bike tail light just enough to spoil its angle, so it pays to check it right away.
After bumpy pavement, gravel, or curb hits, give your light a quick post ride inspection. You’ll catch a loose clamp before it turns into a weak glow in traffic. Touch the mount, feel for wobble, and look for impact damage on the case or bracket. Then make sure the beam still sits level and centered on the rear of your bike.
In case you share rides with a group, this matters even more because everyone counts on your light to stay clear and steady. A fast check takes seconds, but it keeps your crew safer and your setup feeling solid.
Reaim for Traffic View
Since your tail light can shift a little during a ride, it helps to recheck the angle before traffic gets a chance to test it for you. You’re not fussing; you’re protecting your place on the road and keeping your crew of riders safer, too. Set the light so cars see a broad red glow, not a sharp beam.
Then use these quick checks:
- Stand 10 feet behind your bike and confirm rear traffic awareness.
- Tilt the lamp until the road gets light, but drivers don’t.
- Match the setup to your radar detection range.
- Test it after bumps, racks, or rain.
When you do this every ride, your tail light stays ready, and your group stays easier to spot.
Frequently Asked Questions
How Do Radar Tail Lights Improve Rearward Awareness?
You’ll know when a vehicle is closing in from behind because radar detection picks it up early, then rear approach alerts give you a quiet heads up so you can keep pace with your group, make smooth lane changes, and stay informed without repeated shoulder checks.
When Should I Use Peloton Mode on Group Rides?
Use Peloton mode when you are riding close behind others in a group, especially during steady pace sections, so your light does not shine into anyone else’s eyes. It is a simple way to respect the group and keep the ride comfortable for everyone.
Which Lumen Level Works Best for Daytime Commuting?
For daytime commuting, pick a brighter setting in the 100 to 300 lumen range so you stay visible in traffic without overpowering the scene.
Where Should Side-Facing LEDS Be Mounted for Visibility?
Mount side facing LEDs on the bike frame, seatpost, and helmet so drivers can see you from the side. Place the lights where bags, clothing, and spokes will not block them, and keep them positioned to show from more than one angle.
Do Amber Pedal Reflectors Help Meet Legal Requirements?
Yes. Amber pedal reflectors can help satisfy legal lighting rules in many places when you ride after dark. To stay compliant, make sure both pedals have reflectors and that your bike also has the required front and rear lights.