A smart bike speedometer setup starts with a solid sensor mount. Set tire size carefully for better distance and speed readings. Pair any extra sensors cleanly so the data stays steady. Small setup tweaks can turn messy ride stats into numbers you can trust.
Set Up Speed and Wheel Sensors
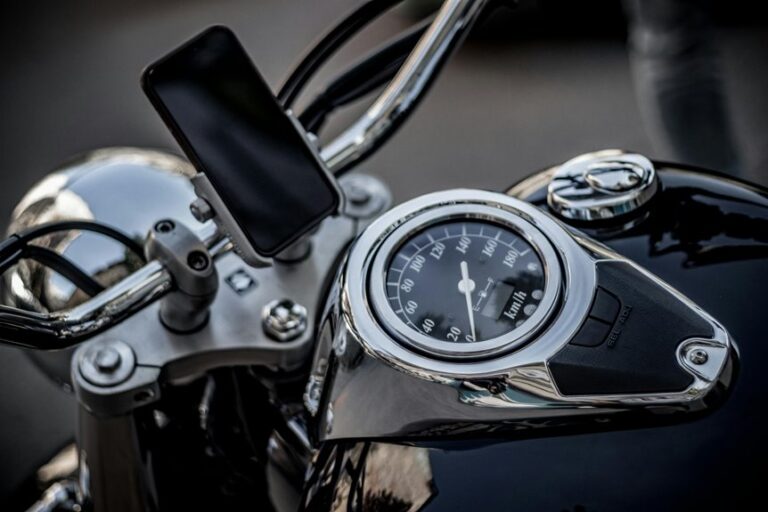
Before you pair anything, start with the speed sensor and wheel magnet, because a clean setup here saves you from headaches later. Mount the sensor on the left fork blade, then use shims or ties for solid sensor mounting. Next, line up the magnet on a spoke so it passes close to the sensor without rubbing. Keep the top edges nearly even, and check wheel sensor alignment from the side.
Provided the gap looks off, slide the parts a little and test again. This small step helps your speed readings feel steady and trustworthy. Also, place the sensor facing forward and keep the magnet snug, so the setup stays calm on rough roads. Once these two parts sit right, the rest of pairing feels much easier for you.
Calibrate Tire Size for Accuracy
Now that your speed sensor and wheel magnet are lined up, you can set the tire size so the bike computer turns that wheel spin into accurate distance and speed.
Enter the wheel circumference from your tire measurement, not just the label on the sidewall, because small changes in tread or inflation can nudge the numbers.
Should you know your exact wheel circumference, use that value for a cleaner reading.
Otherwise, roll the bike one full turn on level ground and measure the travel.
Then enter the result in millimeters and save it.
You’re not chasing perfection here, just a setup that feels solid and keeps your rides in sync with the road beneath you.
That’s how your crew gets better data without the guesswork.
Pair Heart Rate and Cadence Sensors
A quick sensor check can save you a lot of frustration, so start via pairing your heart rate and cadence sensors with care. You’re not alone whenever the prime try feels awkward; most riders need one calm reset. Open pair mode, then wake each sensor with a pedal turn or chest strap touch. Whenever the display hesitates, use sensor pairing troubleshooting before you panic.
- Watch the heart rate icon blink near your steady pulse.
- Feel the pedals turn smooth as cadence zone setup locks in.
- See both numbers settle like your ride crew found its rhythm.
Keep the sensors close, dry, and snug. As soon as the signals land, you’ll feel ready, connected, and part of a bike setup that actually works for you.
Customize Your Speedometer Screens
You can make your speedometer feel easier to read by choosing a screen layout that matches how you ride.
Begin by setting your most significant data fields first, then move lesser details out of the way so your eyes stay on the road.
From there, switch to ride-specific views for climbing, training, or casual rides so the display shows what you need most in the moment.
Screen Layout Options
Across the speedometer screen, layout choices shape how easily you read your ride data while you’re moving.
Whenever you pick a layout density that matches your habits, the screen feels calm, not crowded.
A clean display theme can also make each ride feel like part of the same crew, which helps you settle in fast.
Try these scenes in your mind:
- A bright trail at dawn with wide open spaces on the screen.
- A city commute where compact panels keep things neat and steady.
- A rainy evening ride with bold contrast that stays clear through the mist.
You don’t need a fancy setup to feel at home. Instead, choose a screen style that fits your pace, your eyes, and your ride. That way, the display works with you, not against you.
Data Field Priorities
Upon your speedometer screen starts feeling busy, the best fix is often simple: choose the data fields that matter most and put them where your eyes go first. You’re not alone provided that that takes a few tries. Start with metric emphasis on speed, distance, and average pace, then move less urgent stats lower on the screen. Smart field ordering helps you read faster and worry less.
| Priority | Field |
|---|---|
| 1 | Current speed |
| 2 | Distance |
| 3 | Average speed |
That setup keeps your main numbers clear while still letting you check totals without hunting around. Provided that you like a steady ride, keep one screen clean and consistent. Then, as soon as you glance down, everything feels familiar, and your setup feels like it fits you.
Ride-Specific Views
A smart speedometer feels a lot more useful once you give each ride its own view, because your needs change from one trip to the next. You can build route specific dashboards that show only the fields that matter, so your eyes stay calm and your ride feels smoother.
For a rainy commute, switch to commute focused display modes with speed, time, and distance upfront. For workouts, add max speed and average speed. For weekend loops, keep odometer and trip data ready.
- Envision a dark morning street, where one clear screen keeps you on time.
- Envision a hill climb, where your cadence and speed help you stay steady.
- Envision a quiet trail, where simple numbers leave room for the scenery.
When you match the screen to the ride, you feel like you belong on every road.
Turn On Auto-Pause and Auto-Start
If your ride includes stop-and-go traffic or long coasting stretches, turning on auto-pause and auto-start can make your bike computer feel a lot smarter right away. You’ll keep your stats clean because the screen stops counting when you stop, then picks up again when you roll. That means less editing later and more trust in your numbers.
For auto pause commuting, this is a huge help when you hit lights, crowds, or quick cafe stops. You also get auto start convenience, so you don’t need to tap buttons while you’re settling in or clipping out. Check the setting before your next ride, then test it in a quiet block so you know it reacts the way you like. It’s a small change, but it feels like your setup finally gets you.
Combine GPS and Sensor Data
Your bike computer feels even more useful whenever GPS and wheel sensor data work together, because each one fills in the gaps the other can leave behind. You get steady speed from the sensor and open-road setting from GPS, so your numbers feel calmer and more trustworthy. With GPS sensor fusion, your display can handle brief tree cover, bridges, or city canyons without making you question whether your ride suddenly vanished.
- Visualize your line of travel glowing along a quiet street.
- Visualize your wheel sensor keeping cadence-like speed steady on rough pavement.
- Visualize route smoothing turning shaky map points into a clean path.
When you trust both signals, you ride with the same club energy as everyone else, connected, ready, and in sync. That shared confidence makes each mile feel easier to read.
Sync Ride Data to Your Training App
Getting your ride data into your training app can feel like the final click that ties the whole setup together. When app syncing works, you stop guessing and start seeing your progress in one familiar place. Link your speedometer with the app, then check that the ride export lands with the right date and route.
If the first sync stalls, try again near your phone or computer, and make sure Bluetooth or cable access stays steady. You can also save the file, then import it later if your app supports manual transfer. That little backup keeps your ride from vanishing into the void.
After each ride, review the upload so you know your miles are joining the rest of your story.
Track Elevation, Power, and Speed Data
Once your ride data is safely in the app, you can use it to make sense of the numbers your speedometer collects out on the road.
With elevation tracking, you see where the climb bites and where the road lets up, so each hill feels less mysterious.
Then power analysis shows how hard you worked, not just how fast you rolled.
That mix helps you ride with your crew in a smarter way.
- Imagine a long bridge rise under your wheels.
- Imagine watts climbing as you push into a windy stretch.
- Imagine your speed settling on a flat trail beside friends.
Whenever you compare elevation, power, and speed data together, you spot patterns fast.
You’ll know whenever to ease off, whenever to press on, and whenever your pace really matches your effort.
Fix Sensor Signal Drops and Inaccurate Readings
If your speedometer keeps dropping signal, start with checking the sensor’s position on the fork and the magnet’s path on the wheel. A tiny gap or a crooked angle can throw off the reading, so keep both parts lined up and steady.
Then look for wireless interference nearby, since lights, phones, and other devices can make the signal act flaky.
Secure Sensor Alignment
Whenever your bike speedometer starts dropping signal or showing odd numbers, the sensor setup is usually the initial place to check. You want the parts to feel like one team, not two strangers on the trail. Use fork blade mounting so the sensor sits straight and firm. Then check spoke magnet spacing with care.
- Hold the sensor level with the magnet path.
- Keep a tiny gap, close enough to read cleanly.
- Tighten the mount so bumps won’t nudge it.
If the sensor shifts, your readings can drift fast.
Reduce Wireless Interference
Wireless glitches can feel maddening, but you can usually calm them down with a few careful setup checks. First, scan your bike for interference sources like phone mounts, power lines, lights, and other sensors. Move your display and sensor away from crowded bars if you can.
Next, keep the sensor-to-display path clear, because signal shielding helps when metal frames or bags block the link. If your readings still jump, test the bike in a quiet spot and note when the dropouts start. Then replace weak batteries and re-pair the system, since low power can act like a sneaky troublemaker.
You’ll often get steadier numbers once you trim nearby gadgets and give the signal a cleaner lane. That’s how you ride with less fuss and more trust.
Review Ride Trends to Improve Training
Once you start reviewing your ride trends, your speedometer turns from a simple screen into a useful training partner.
You can spot training adaptation faster when you compare speed, distance, and average pace over several rides. That helps you see performance patterns before your legs feel it. Try this:
- Check your fastest hill repeats and observe where you faded.
- Compare weekday and weekend rides to find steady gains.
- Match cadence and speed on similar routes to see what changed.
Then you can shape the next ride with confidence. Whenever your pace drops on windy days, that’s not failure, it’s data. You’ll feel more at home in your training group when you know your numbers and can talk about them with ease.
Frequently Asked Questions
How Do I Mount the Speed Sensor on a Fork With Shims?
Place the shims beneath the bracket until it matches your fork, then fasten it with cable ties. Verify the fork fit and shim position, since 1 mm accuracy helps the sensor read consistently.
What Gap Should I Leave Between the Magnet and Sensor?
Leave about 1 mm to 3 mm between the magnet and sensor to keep the magnet from contacting the sensor while still allowing a reliable trigger. Set the sensor carefully so the alignment is accurate and the spacing stays tight enough for consistent detection.
How Far Can the Display Be From the Speed Sensor?
You can place the display up to 27.5 inches from the sensor, though a shorter distance is better. Keeping it closer helps maintain a strong signal and makes setup more reliable during the ride.
How Do I Enter a Manual Tire Circumference Value?
Enter manual calibration by holding the set and mode buttons, then choose custom settings to enter your tire circumference. Type the 4 digit millimeter value, confirm it, and the display saves it.
What Should I Do if the Sensor Won’t Pair Automatically?
If auto pairing is not working, try a battery reset, reopen the app, then enter the sensor ID by hand. Turn the wheel, confirm the sensor is lined up, and try again.