Smart bike lights work best with the right setup, not just more brightness. A solid mount, the correct beam angle, and a clear flash pattern help drivers spot you sooner. A quick battery check keeps that visibility steady on every ride. These simple setup tips can help your bike stand out better on busy streets and dark roads.
Mount Smart Bike Lights for Visibility
A smart light setup starts with where you mount each light, because even a bright beam can fail when bags, jackets, or your bike frame block it. Put your front light on the handlebars or stem, where drivers and riders can spot you fast. Place your rear light on the seatpost, or add one to your helmet for extra presence in traffic.
That placement supports legal mounting placement and helps you feel part of the road, not concealed on it. Next, choose secure attachment options that stay firm over bumps, curbs, and wet streets. Use wraparound lights, side LEDs, or bar-end plugs to widen your shape from every angle. Provided your area requires daytime running lights, keep both lights mounted and ready, so you roll out feeling seen, steady, and included every ride.
Aim Your Smart Bike Lights Correctly
Once you’ve mounted your lights, you need to aim them with care so you can see clearly without blinding others.
Set your front beam low enough to control glare, but high enough to light the road ahead, with the center aimed about 10 steps in front of you for city riding.
Then check the angle of both front and rear lights, because a small adjustment can make you far more visible and much safer.
Set Beam Height
Why does beam height matter so much? It decides how well you see and how comfortable others feel around you. Set your front light so the beam cutoff stays below eye level. That gives you strong road surface visibility without blasting faces. A good starting point is to center the beam about 10 steps ahead for city riding.
| Beam height | What you get |
|---|---|
| Too high | Glare, less trust, wasted light |
| Well set | Clear lane view, safer shared roads |
When your light sits at the right height, you become part of the flow, not the rider everyone squints at. That matters on group rides and busy streets. Check height with your bike loaded as usual, since bags and body weight can change where the beam lands each trip.
Angle For Visibility
Two small angle changes can make a huge difference in how well drivers and other riders notice you. Start by turning your front light slightly outward, not just straight ahead. That helps your beam spread reach more of the lane and makes you easier to spot at intersections, driveways, and turns where people often miss cyclists.
Next, tilt your rear light so it points straight back from your riding position, not from the parked bike angle. When you sit on the bike, the seatpost can shift that aim. A small adjustment improves side visibility and helps your flash pattern stay clear from more directions.
Should you use helmet or bar-end lights too, match their angle with your main lights. That way, you look more present, more predictable, and more like part of the road community.
Prevent Glare Issues
Even a very bright light can work against you when you aim it too high. Your smart bike light should help your group stay safe, not blind others on the road. For strong glare reduction, point the beam slightly downward so it lights the pavement, not faces. A clean beam cutoff matters because it keeps your path clear while respecting riders, walkers, and drivers around you.
- Aim the beam center about 10 steps ahead.
- Test it at night on a quiet street.
- Lower the light if drivers flash at you.
- Use steady mode in dark areas for control.
- Check mounts often so bumps don’t tilt it upward.
That small adjustment makes you look confident and considerate. You become the rider people trust to share space well, and that helps everyone feel safer together at night.
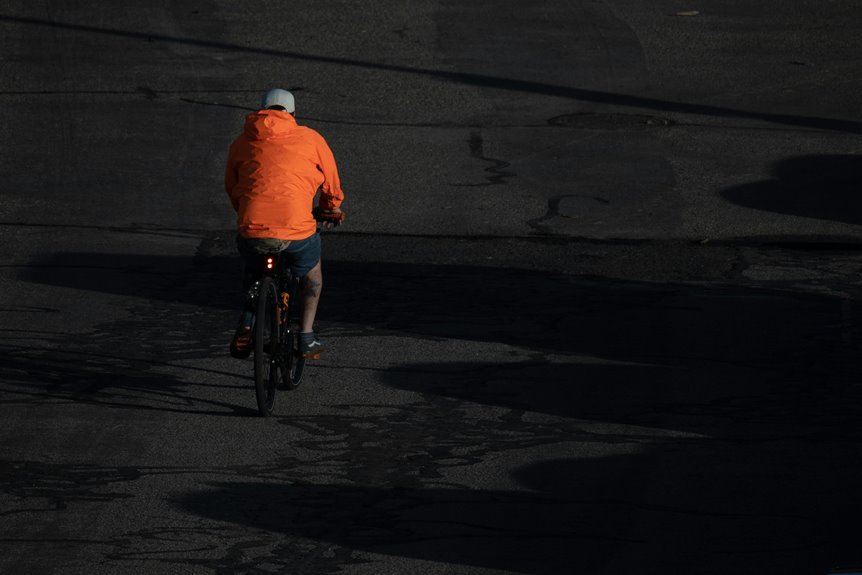
Add a Rear Bike Light Drivers Notice
A rear bike light is one of the simplest ways to help drivers notice you sooner and give you more space. Whenever you ride with one, you enhance rear visibility and support faster driver attention in busy streets, neighborhoods, and low-light weather. That small red light helps you feel like part of a safer cycling community.
Place your rear light where cars can see it clearly, usually on your seatpost or helmet, and keep bags or jackets from blocking it. In many regions, a red rear light isn’t just smart, it’s required. Even during the day, running a rear light helps drivers judge your position sooner. Should you ride with friends or family, matching this habit makes everyone easier to track in traffic. It’s a simple step, but it helps you belong out there.
Use the Right Bike Light Mode
Once your rear light is easy for drivers to spot, the next step is choosing the mode that fits the ride. The right setting helps you stay visible without overthinking it, and that makes every ride feel more confident.
- Use steady mode whenever it’s dark and you need clear road illumination.
- Switch to day riding modes whenever sunlight washes out weaker beams.
- Pick high-steady at dusk, because changing light needs stronger visibility.
- Use pulsing modes in busy areas whenever you want extra attention.
- Save low traffic flash patterns for quieter streets where you still want presence.
This simple habit helps you match your light to real conditions instead of guessing. You ride with more confidence, drivers read you faster, and you feel like part of a safer, smarter cycling community every single day.
Choose a Flash Pattern Drivers Notice
Clarity matters as you choose a flash pattern, because drivers don’t get much time to understand what they’re seeing. You want a signal that feels familiar, quick to read, and easy to track in traffic. That means skipping chaotic strobe effects that blur your position. Instead, pick day flash patterns with a clear rhythm, short pause, bright pulse, repeat. Drivers notice movement best when it looks intentional.
For that reason, attention grabbing pulses work better than random flickers. A steady cadence helps people judge where you’re and how you’re moving. In a group ride or on a busy commute, that makes you easier to read and easier to respect. If your light offers several flash options, test them from a car-length away. You’ll spot the pattern that says, “I’m here,” without shouting.
Set Bike Light Brightness for Your Route
Good flash patterns help drivers notice you, and the right brightness helps them judge where you’re without getting blinded. Match route brightness to where you ride, so you fit in with traffic and stay comfortable, too.
- Use higher lumens output on dark roads where you need to see farther ahead.
- Choose moderate brightness in town, since streetlights already help fill in the road.
- Keep your front light around 300 lumens minimum for seeing and being seen.
- Run a stronger day-flash in sunlight, because bright daylight can wash you out fast.
- Lower overly harsh settings in busy areas, so you don’t blind people approaching.
As your route changes, your settings should change with it. A well-aimed beam with sensible brightness often works better than simply picking the highest mode every time out.
Add Extra Lights to Helmet or Frame
As brightness and beam aim get your main lights working well, extra lights on your helmet or frame help people spot you sooner from more angles. That gives you a stronger visual presence in traffic, which helps you feel more confident and connected on group rides or solo commutes.
With helmet mounting, you add a light that follows your gaze at turns, driveways, and crossings. A small rear helmet light also lifts your red signal higher, where drivers notice it faster.
Then add frame side lights or bar-end lights to widen your shape and support true 360-degree visibility. Place them where bags, bottles, or jackets won’t block the beam. Should you ride with friends, this setup helps everyone read your position more easily, and that shared clarity makes the whole ride feel smoother and safer together.
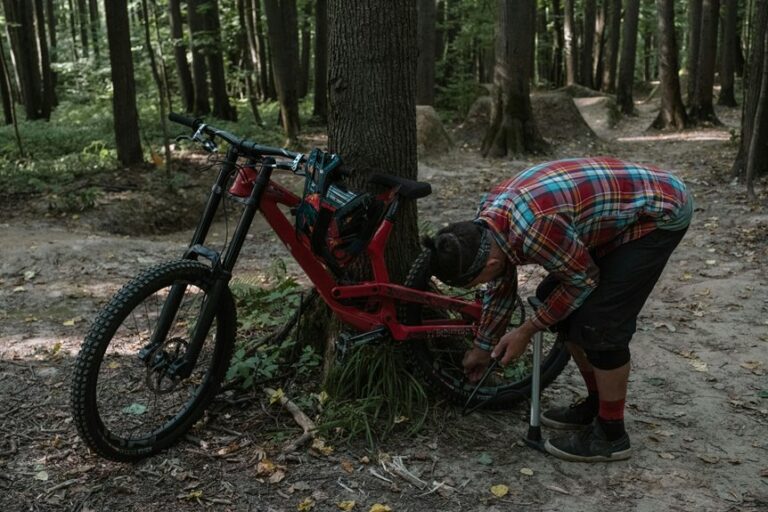
Check Smart Bike Light Battery Before Rides
Extra lights help you get noticed from more angles, but they only help provided they’ve got enough charge to last the whole ride. Before you roll out, give every light a quick battery health check so you stay visible with the group, not stranded with a dim blink.
- Do a fast charge level review before every ride.
- Recharge after rides, and give lights a full weekly charge.
- Watch for shorter runtime, because that can signal aging cells.
- Check app alerts or indicator LEDs, should your smart lights have them.
- Keep a backup cable or power bank in your gear kit.
This habit connects you with riders who show up prepared and look out for each other. A charged setup means less stress, better focus, and one less surprise when traffic gets busy around you.
Test Your Bike Lights on Real Rides
Take your setup on a real night ride, because that’s when you’ll notice whether your front beam reaches far enough and your rear light stands out clearly.
As you ride, check how well you can see the road, how visible you feel at intersections, and whether any mount shifts on bumps.
Then make small adjustments to the angle, mode, or position so your lights work better on the next ride.
Night Ride Checks
Before you trust your lights on a dark ride, test them on a real street, bike path, or quiet road that matches where you usually ride. That quick check helps you feel part of the prepared rider crowd, not the surprised one. Start with your battery status and light mount security, then notice how your setup works with traffic, bumps, and shadows around you.
- Ride your normal pace, so beam reach feels true.
- Check whether your front light shows road edges and hazards.
- Watch whether your rear light stays visible over rough pavement.
- Notice glare on signs, parked cars, and wet surfaces nearby.
- Ask a riding buddy how visible you look from behind.
As you test, use the same modes you’d choose at night. You’ll spot what feels steady, clear, and confidence-building before longer evening rides.
Adjust After Testing
Once you’ve seen how your lights behave on a real ride, adjust them right away so the setup works with your streets, speed, and riding position. What feels perfect in the garage can shift outside, especially on rough pavement, fast corners, or busy streets.
Start with beam aim. Lower a front light that throws glare, and raise one that fades too close to your wheel. Next, check mount stability after bumps, curbs, and hard braking. When the light twists or droops, tighten it or swap the strap.
Then review your quick release fit so the light stays secure but still comes off easily when you park. Keep testing small changes on familiar routes. That way, your setup starts to feel like part of your riding group, reliable, visible, and ready every day.
Frequently Asked Questions
Are Smart Bike Lights Legal in Daytime Riding?
Yes, smart bike lights are legal for daytime riding, and some regions require them. Running both front and rear lights on every ride improves your visibility in traffic, helps you meet local rules, and makes you easier for drivers to notice.
How Often Should Bike Light Lenses Be Cleaned?
Clean your bike light lenses once a month, since even a thin layer of road film can cut light output. In your riding group, sticking to a regular cleaning schedule helps prevent grime from reducing brightness, visibility, and rider confidence.
What Color Bike Lights Are Legally Required?
A white front light and a red rear light are the legally required colors for bike lights. Use both on each ride to stay compliant and easier to see.
How Long Should Rear Light Battery Runtime Last?
Choose a rear light that covers your longest ride with extra battery to spare, ideally 6 to 12 hours on steady mode or up to 54 hours on flashing mode. That gives your group dependable battery life and helps everyone plan ride time more accurately.
Should Bike Lights Be Removed When Parking in Public?
Yes, you should remove bike lights when parking in public, especially if they use quick release mounts. Taking them with you reduces the chance of theft and helps make sure your lights are still there when you need them for the ride home.