
A bike chain is like a stretched rubber band, and once it loses its snap, your ride feels it. Wear shows up in the look, the sound, and the way your gears shift. A bad skip can arrive before the problem feels serious. Spotting those signs early helps keep your drivetrain from turning a small fix into a pricey repair.
What a Worn Bike Chain Looks Like
As a bike chain starts to wear out, it usually looks a little longer, looser, and less crisp than it did as it was new. You might notice the chain stretch appearance when the links stop sitting tightly together. Those chain elongation signs often show up as a chain that hangs with a softer line and settles less cleanly on the teeth.
You won’t need to panic. This change can happen slowly, so your eyes might catch only small shifts initially. Still, the chain can look slightly tired, with edges that seem less sharp and movement that feels less exact. Because you ride with it every day, you’ll know whenever it no longer looks snug and confident on the bike.
Visible Chain Wear Signs
One of the clearest visible signs of chain wear is while the chain no longer sits snugly on the bike and starts to look stretched out under your eyes. You could also spot chain sag, where the links hang looser than they should. Whenever you check the chain closely, look for rust streaks along the side plates, since that often shows the metal has been exposed and weakened.
- Compare each section for even tension.
- Lift the chain and watch for extra daylight.
- Check for stiff or shiny links.
- Inspect the same spots after cleaning.
These signs help you feel more confident before a ride. In case your chain looks worn in more than one place, it’s a smart time to act.
Audible Chain Wear Signs
A chain can look fine and still tell on itself with sound, so your ears matter just as much as your eyes. As you ride, listen for chain noise patterns that feel rough, dry, or oddly sharp. A healthy chain usually hums quietly, but worn links often make grinding sounds during pedaling that you can hear on steady pressure.
| Sound | What it could mean |
|---|---|
| Light hiss | Normal chain movement |
| Dry tick | Needs cleaning or lube |
| Rough rasp | Initial wear warning |
| Grinding | Likely chain wear |
| Loud chatter | Check soon |
If you hear these points often, you’re not alone, and your bike is asking for attention. Compare the sound in several gears, then inspect the chain before the noise gets louder and less forgiving.
How Chain Wear Affects Shifting
As your chain wears out, you could notice a delay before the gear catches, and that lag can make each shift feel less sure.
You could also feel the chain skip under hard pedaling, especially in the smaller cogs where the load hits fast.
Over time, worn links can make every shift rough, so your shifts lose that smooth, easy feel you want on the road.
Delayed Gear Engagement
- The shifter clicks, but the shift lags.
- The chain moves, then pauses.
- Gear changes feel less crisp.
- You need more pedal force to get a clean shift.
When you see this pattern, you’re not alone. It’s your bike asking for attention, and a wear check can help you stay in the ride group.
Skipping Under Load
Skipped gears under load are a louder warning than delayed shifting, because now the wear shows up right where you need grip most. When you push hard, the chain can’t hold each tooth cleanly, so it jumps on a hill climbing load or during sprint torque stress.
That moment feels personal, but it’s common among riders who’ve worn the chain past its best. You can notice the slip most in smaller cogs, where the fit matters more. Should it happen once, check the chain soon.
Should it repeats, measure wear at several spots and don’t wait for a worse day on the road. A fresh chain usually restores smooth power, and it helps you ride with the group instead of chasing it.
Rough Chain Transitions
Even though your chain isn’t skipping hard under load, rough shifts can still tell you it’s getting tired. You might feel rough changes whenever the chain meets the cassette teeth late or hesitates before settling. That delay often comes with chain chatter, especially in the smaller cogs, and it can make every shift feel a little off.
You’re not imagining it; worn links don’t mesh as cleanly, so the drivetrain loses that smooth, confident snap your group expects.
- Shifts feel slow.
- Chain noise rises.
- Gear changes miss their crisp finish.
- Pedaling sounds gritty.
Whenever you notice these signs together, check wear soon. A fresh chain helps you get back that quiet, connected ride and keeps your bike feeling like part of the crew.
Check Chain Wear With a Gauge
A chain gauge gives you a quick, clear way to check how much your chain has stretched, so you don’t have to guess.
You’ll place the tool on the chain, read the wear mark, and compare it to the maker’s limit.
Once the gauge shows the chain has hit that limit, it’s time to replace it before it starts hurting your cassette too.
Gauge Tool Basics
How do you know at the moment your chain is really worn? A gauge tool gives you a quick, friendly check, so you don’t have to guess. Before you start, confirm tool compatibility with your chain type and read the maker’s guide. Also, do checker calibration in case your model needs it, because a small setup error can mislead you.
Then place the tool on a clean section of chain and let it sit flat.
- Pick the right side for your chain.
- Check more than one spot.
- Keep light pressure steady.
- Repeat after cleaning.
This simple habit helps you stay confident, protect your ride, and feel like you’re in the know with your cycling crew.
Reading Wear Measurements
When you read a chain wear gauge, the real goal is to match the number or marker to a clear wear limit, not just to see whether the tool fits. You’re looking for a result that tells you where your chain stands today.
With a simple gauge, a drop at 0.5% or 0.75% means something real, so compare it with your bike’s speed range and maker guidance. Digital wear readings can make this even easier, because they show the chain’s stretch as a percentage. That helps you use reading percentage limits with confidence instead of guessing.
Check more than one location on the chain, too, because wear can vary. Whenever the numbers line up, you’ve got a solid answer.
When To Replace
With a gauge in hand, you can stop guessing and make a clear call on chain replacement before damage spreads.
You’re part of a smart riding crowd when you check wear at several spots, because one reading can lie. Use these chain replacement thresholds:
- 6 to 10 speed: replace at 0.75% wear
- 11 to 13 speed: replace at 0.5% wear
- Single speed: replace at 1% wear
- Should one section read higher, trust the worst spot
That’s where speed specific wear limits matter. A chain that passes 12 1/16 inches needs attention, and 12 1/8 inches means the cassette maybe tired too.
Should your gauge say replace, act now. You’ll protect your drivetrain and keep every shift feeling smooth, familiar, and ready for the next ride.
Measure Chain Wear With a Ruler
A simple ruler can tell you a lot about your chain’s health, and it only takes a minute to check. Shift to the small rear cog, then place the ruler across 12 links for a ruler pin to pin measurement. A new chain should land at exactly 12 inches.
If you reach 12 1/16 inches, you’ve crossed common chain elongation thresholds and should plan a change soon. At 12 1/8 inches, the wear is further along. Check a few spots on the chain, because one section can fool you.
That small habit helps you stay ahead of problems and keeps your rides smooth, confident, and stress free. If the numbers feel close, trust the ruler, not wishful thinking.
How a Worn Chain Damages Your Drivetrain
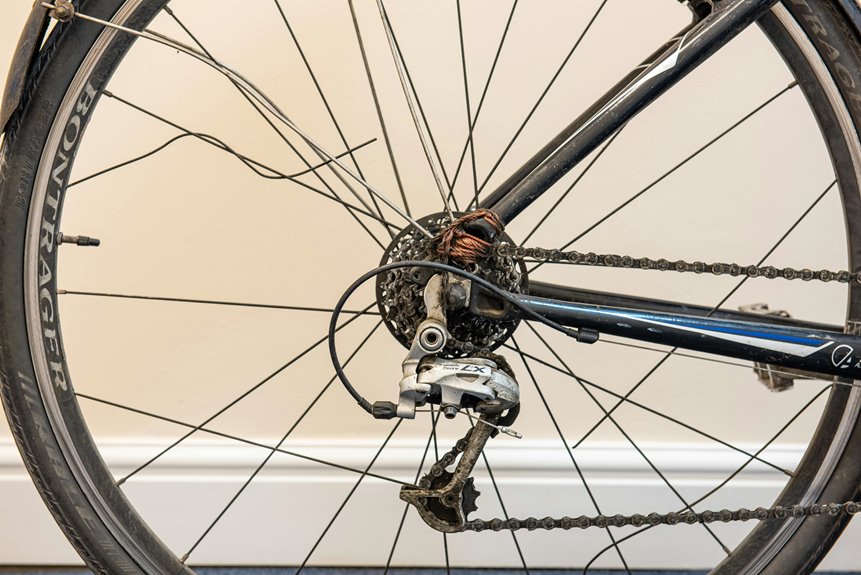
As the chain stretches past its healthy limit, it starts to act less like a smooth connector and more like a misfit part that chews on everything around it. You might feel a tiny slip initially, but that small problem can trigger a chain wear cascade that hits your cassette, chainrings, and pulleys. As the rollers no longer match the teeth, the load spreads unevenly and speeds up drivetrain component damage.
- Teeth hook and sharpen.
- Shifts feel rough.
- Power slips under pressure.
- Noise grows with every pedal stroke.
That damage can make your bike feel unfriendly, like it’s turning its back on your ride. Whenever you want to stay in the crew of smooth, quiet riders, catching wear at the beginning keeps the whole drivetrain working together and saves you from costly surprises.
When to Replace a Bike Chain
Once a worn chain starts chewing through your drivetrain, you need to know as soon as it’s time to swap it out before the damage gets expensive.
You can feel confident while you check chain replacement timing early and often. Measure the chain, not the miles, because riding style, grit, and weather change wear fast. If your chain hits manufacturer wear thresholds, replace it right away. For many bikes, that means about 0.5 percent stretch on 11 to 13 speed chains and 0.75 percent on 6 to 10 speed chains. If you ride a single speed, you might wait a bit longer. Also, inspect several spots on the chain, since uneven wear can hide trouble.
That simple habit keeps your rides smooth and your crew ready for the next climb.
Signs Your Cassette Is Also Worn
Should your bike skips under load even after you’ve put on a fresh chain, your cassette might be the real problem.
Look closely at the teeth, because shark fin shapes or hooked tips usually mean the sprockets are worn.
Whenever you spot both skipping and those sharp-looking teeth, it’s time to treat the cassette as part of the repair, not just the chain.
Skipping Under Load
When your bike chain starts skipping under load, that’s often a strong sign that the cassette has worn too. You might feel it on hard climbs or quick sprints, as chain retention drops and torque spikes push the drivetrain past its grip. You’re not alone if that feels frustrating. Check these signs:
- The skip happens in one gear.
- It shows up only while you pedal hard.
- The chain stays quiet in easier gears.
- A new chain still slips.
That pattern usually means the teeth and chain no longer match well. So, in case you want your ride to feel steady and trusted, inspect the cassette with the chain. Small changes now can keep your bike smooth and keep you in the group, not chasing it.
Shark Fin Teeth
Check the chainring tooth profile too, because a worn chain can keep chewing both parts at the same pace. Whenever the teeth look lean, uneven, or polished at the tips, your cassette is likely close to done. You don’t need to panic. Just compare several cogs, then match what you see with chain stretch and shifting feel. Once the teeth look this tired, your ride is asking for help.
How Riding Style Speeds Up Chain Wear
Your riding style can wear out a chain much faster than the miles on your odometer suggest. Whenever you pedal hard in a big gear, you stress the chain with torque spikes. Smooth spinning helps more because cadence effects spread force over more revolutions. You’re not alone here; many riders do this while climbing or chasing speed. To protect your drivetrain, try this:
- Shift before the hill bites.
- Keep your legs moving lightly.
- Avoid stomping on starts.
- Ease power during surges.
During steady-pressure riding, the chain stays happier and the cassette does too. Small habits matter, and your bike thanks you with quieter shifts and less grit-filled drama.
How Chain Wear Differs on Road Bikes and MTBs
Because road bikes and MTBs put stress on chains in different ways, the wear patterns don’t look quite the same. On your road bike, steady power and tight gears can make wear feel gradual, so road bike wear intervals often show up earliest as small shift losses or a chain that measures long at 12 links.
On your MTB, stop-and-go hits, climbs, and hard gear changes create mtb chain stretch differences that can show sooner in certain spots. So you should check several chain sections, not just one.
When you ride an 11-speed setup, you’ll usually replace earlier than on older drivetrains. That said, your chain still wants the same care, and you belong to the riders who catch wear before it steals smooth shifting.
Wet Weather and Dirty Chains
Wet weather can make a chain wear out faster than many riders expect, and dirty conditions usually speed that up even more. Whenever you ride through puddles, grit works like sandpaper inside the links. You can help your bike stay strong by giving it quick muddy drivetrain care after every soggy ride. Try this rain ride maintenance routine:
- Wipe the chain with a dry rag.
- Rinse off mud gently, not with hard spray.
- Dry the chain fully before lube.
- Add fresh lubricant so water can’t cling.
If your chain looks dark, stiff, or noisy after a storm, don’t shrug it off. Your crew rides better whenever each bike feels cared for, and yours deserves that same respect. Clean, dry, and lube it soon, so wear doesn’t sneak up on you.
How Often to Check Chain Wear
After a muddy ride, it’s smart to assess about chain wear before it turns into a bigger repair bill.
Set an inspection schedule that fits how you ride, so you stay ahead of surprises and feel part of a crew that keeps bikes ready. For many riders, a quick check every 200 to 300 miles works well, but your maintenance interval should get shorter provided you ride in rain, dust, or heavy traffic. Clean your chain before anything else, then measure wear with a ruler or chain checker.
Should you commute daily, look at it monthly. Should you race or grind through grit, check it every few rides.
As soon as you make this part of your routine, you catch stretch in its early stage, protect your cassette, and keep every shift feeling smooth and confident.
Common Chain Wear Checking Mistakes
One of the easiest mistakes is trusting a chain check that only looks at one spot, since wear can vary along the length of the chain. You fit in better with your bike crew while you check it the right way. Avoid tool selection errors by choosing a checker that matches your drivetrain, then compare it with a ruler for backup. Use measurement consistency checks so you test the same section, in the same position, every time.
- Don’t read one link and call it done.
- Don’t mix tools without checking their scale.
- Don’t measure on a dirty chain.
- Don’t ignore a second reading on another section.
If your numbers change a lot, the chain could be uneven, and that clue matters. While you stay steady, you catch real wear, not guesswork, and that keeps you confident on every ride.
Keep a New Chain Running Longer
To keep a new chain running longer, you should clean your drivetrain often so grit doesn’t grind away at the metal.
You’ll also get better life whenever you shift smoothly, because sharp, hard shifts put extra strain on the chain.
And whenever you avoid forcing the pedals under heavy load, you help the chain stay quiet, strong, and ready for more miles.
Clean Drivetrain Often
Keeping your drivetrain clean often helps a new chain last much longer, and that matters because grime works like sandpaper on every ride. You don’t need a perfect garage setup to stay in the group. Set your chain cleaning frequency according to weather and miles, then follow a simple routine:
- Wipe the chain after wet rides.
- Use degreasing and drying before fresh lube.
- Clean cogs and jockey wheels too.
- Check for dark paste that hides in links.
When you keep dirt out, your chain bends easier and wears more evenly. That means fewer surprise replacements and a smoother feel on your usual routes. A clean drivetrain also helps you spot initial wear signs faster, so you and your bike team can trust every pedal stroke together.
Shift Smoothly, Avoid Force
Smooth shifting can save a lot of chain life, and it also saves you from that awful bang as the drivetrain protests mid-ride. Upon shifting lightly, your chain moves with less stress, so smooth shifting becomes part of your crew’s best habits. Ease off the pedals for a moment, then let the gears catch without drama.
Should you mash the shifter or stand on the pedals, you force the chain to climb under load, and that abuse speeds wear. To avoid overforce, match your effort to the terrain, especially on hills or sprint starts. You’ll hear the difference right away: less clunking, less grinding, and more confidence every time you ride together. That calmer feel helps your new chain stay accurate, quiet, and ready for the next mile.
Frequently Asked Questions
Which Chain Checker Works Best for Aluminum Cassettes?
Rohloff Caliber 2 is a strong choice for an aluminum cassette because it gives precise chain wear readings and helps you spot wear before it damages the cassette. Use the A side for accurate checks and better drivetrain care.
Does Chain Wear Matter More on 11-Speed Bikes?
Yes. Eleven speed wear matters more because the tighter tolerances leave less margin for chain stretch, so replacing the chain sooner helps protect drivetrain life. It also keeps shifting cleaner, reduces skipping, and makes group rides feel smoother.
Can I Measure Chain Wear at Multiple Points?
Yes, you can, and you should. Checking multiple points along the chain helps you spot uneven wear and gives you a more reliable reading, so you can keep your ride running smoothly.
What Does a Rohloff Caliber Tip Drop Indicate?
A tip drop on your Rohloff Caliber indicates your chain has stretched beyond the wear limit and needs replacement. In chain wear diagnosis, that 1 percent shift matters because it helps protect your drivetrain and keep your ride reliable.
Is Riding Distance a Reliable Way to Track Chain Wear?
No, riding distance alone is not a dependable measure. Mileage can give you a rough guide, but chain wear also depends on riding conditions, cleaning, and shifting, so inspect it regularly.