Keeping your brakes in good shape is simple and pays off every ride. Check lever feel, pad wear, cable tension, grime, and caliper alignment. Small fixes now can stop weak braking and squeaky noise later. A quick brake routine gives you safer, smoother stopping with less hassle.
Do a Quick Brake Safety Check
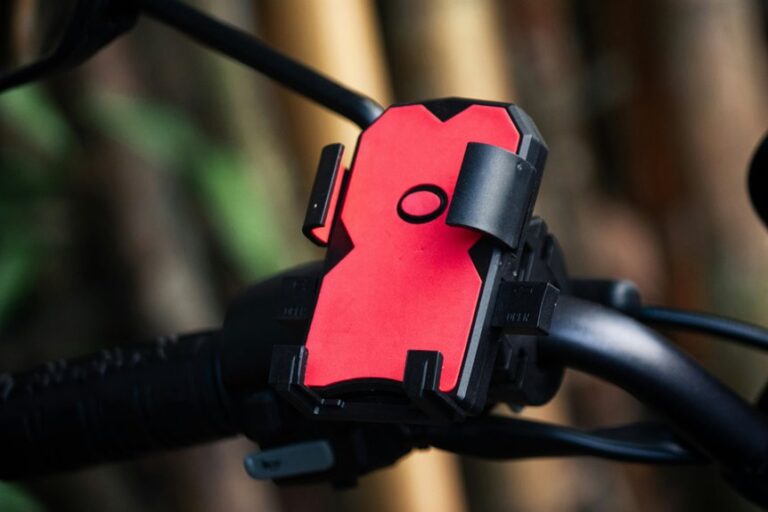
Before you head out, take a quick brake safety check so you can ride with confidence instead of crossing your fingers. Squeeze each lever and feel for brake lever travel that starts firm, not spongy. When the lever comes too close to the bar, you might’ve air in the system or worn parts.
Next, look for lever wear, cracks, or loose pivots, because a tired lever can steal control whenever you need it most. Then spin each wheel and listen for a light rub, since quiet brakes often mean the setup feels right.
Finally, test both brakes while you roll slowly in a safe spot. That small habit helps you catch trouble sooner and keeps you in the rider circle.
Inspect Brake Pads for Wear
Your quick brake test can tell you a lot, but the pads deserve a close look too, since worn material can quietly steal stopping power whenever you need it most. You can feel more confident when you check them monthly, especially after wheel removal or muddy rides. Look for brake wear on both pads, and compare pad thickness to the maker’s limit. Whenever the friction layer is thin, or the backing plate shows close, replace them soon.
- Slide the wheel out and spot the pad surface.
- Check that pad thickness stays above 3 mm.
- Watch for glazing, cracks, or uneven edges.
- Replace pads whenever material is under 1 mm.
That simple habit helps you stay ready with the group and keeps every ride safer.
Clean Brake Pads, Rotors, and Rims
A clean braking system feels smoother, sounds quieter, and gives you more confidence on every ride.
You can keep that feeling by wiping pads, rotors, and rims with a clean cloth after muddy or wet rides. Use disc brake cleaner for brake surface degreasing, then let the parts dry fully before you ride again. Keep your fingers off the braking faces, since skin oil can slip in fast and ruin grip. For rim contamination prevention, rinse off grit and road film before it bakes on. Should you use rim brakes, clean the sidewalls where the pads touch. Check pads for shiny glaze and remove any dirt stuck in the grooves. Whenever you stay ahead of grime, you ride with the crew, not against the bike.
Adjust Brake Cable Tension
Whenever your brakes start to feel soft, spongy, or slow to bite, cable tension is often the initial thing to check. You’re not alone when that feels annoying; a small tweak can bring back a firm, confident lever. Start by finding the adjuster and turning it a little at a time. Watch for cable stretch, because new cables often settle after rides. Keep lever freeplay small, but don’t remove it completely.
- Squeeze the lever and feel the response.
- Turn the barrel adjuster in short steps.
- Test the brake after each change.
- Stop once the wheel slows fast and clean.
If the cable still feels loose, loosen the anchor bolt, pull the cable snug, and retighten it. Then ride around the block and check again. You’ll know you’ve got it once the lever feels steady and your braking feels like part of the bike.
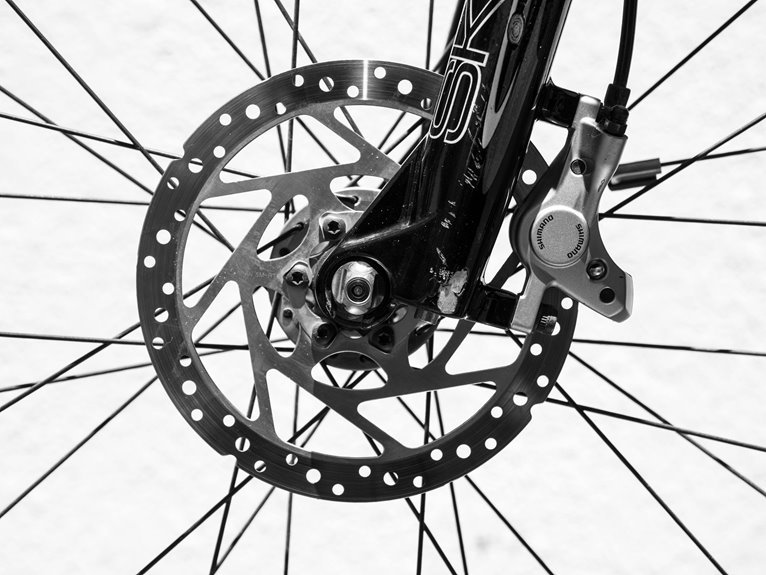
Center Your Disc Brake Calipers
Loosen the caliper bolts just enough so the brake can float into place, then squeeze the lever and center the caliper around the rotor.
You want equal pad clearance on both sides so the rotor spins freely without rubbing.
Once it sits right, tighten the bolts while holding that position so the adjustment stays put.
Loosen Caliper Bolts
If your disc brake rubs or drags, you can usually fix it by centering the caliper, and the first step is to loosen the caliper bolts just enough so the body can move a little. Check your caliper bolt access so you can reach them cleanly, then keep a steady hand and avoid stripping the heads. This small release helps brake mount alignment happen when you reset the caliper against the rotor.
- Loosen both bolts evenly.
- Hold the brake lever lightly.
- Let the caliper settle in place.
- Snug the bolts without shifting the body.
You’re not forcing anything here, just giving the brake room to find its home. That calm, careful touch helps you stay part of the ride crew, with a brake that feels right and quiet.
Align Pad Clearance
Once the caliper bolts are snug and the brake can settle, you can center the pads so they sit evenly on both sides of the rotor. Gently squeeze the lever, then hold it while you tighten the bolts. That small pause helps your brake alignment lock in cleanly. Check pad clearance by spinning the wheel and listening for rub. If you hear a light scrape, loosen the bolts and shift the caliper a touch.
| Check | What you want |
|---|---|
| Rotor | Runs straight |
| Left pad | Stays off the disc |
| Right pad | Stays off the disc |
| Lever feel | Smooth and firm |
You’re not chasing perfection alone here. You’re building a brake that feels calm, confident, and ready with your crew on any ride.
Stop Brake Squeal and Spongy Feel
If your brakes squeal or feel mushy, start with cleaning the brake surfaces so dust and oil don’t keep causing trouble.
Then check that the pads sit squarely on the rotor, because a small misalignment can make a loud noise fast.
When the lever still feels soft, you might need to bleed the hydraulic lines to push out air and bring back firm stopping power.
Clean Brake Surfaces
A clean brake system can turn a noisy, mushy ride into one that feels sharp and calm. You help that happen through wiping rotors and pad faces after wet or gritty rides. Use brake cleaner use on a clean cloth, then let the parts dry before you ride. That simple habit cuts surface contamination and helps your brakes bite like they should.
- Spray the rotor lightly, not heavily.
- Wipe with a lint-free cloth.
- Keep oily fingers off every braking surface.
- Check pads for grime before reinstalling.
When you clean often, you join the riders who trust their brakes on every hill. A few careful minutes now can save you from squeal later, and your hands stay cleaner too.
Align Brake Pads
When your brakes squeal or feel soft, the pads are often sitting just a little out of line, and that small twist can make a big mess of the ride. You can fix a lot with careful pad positioning and calm caliper spacing. Loosen the mount, squeeze the lever, and center each pad so it kisses the rotor evenly. Then tighten everything while you hold that line.
| Feel | What you want |
|---|---|
| Squeal | Even contact |
| Rub | Quiet spin |
| Soft lever | Firm bite |
| Wobble | Straight track |
| Confidence | Safer rides |
You’re not fixing it alone. Every rider in your crew wants that smooth stop too. A tiny tweak here brings you back into the pack, with brakes that feel steady, friendly, and ready.
Bleed Hydraulic Lines
Because trapped air can make your brake lever feel mushy and your bike sound unhappy, bleeding the hydraulic lines is often the fix that brings back a clean, confident stop.
When you bleed the system, you push out air and replace old fluid, so the lever feels firm again. Your bleed frequency depends on how hard you ride and on hydraulic fluid choice. DOT systems usually need yearly service, while mineral oil setups can go longer. If you ride muddy trails or brake hard often, check sooner.
- Follow your brand’s bleed steps.
- Use the correct fluid only.
- Keep bleed ports clean.
- Test the lever until it feels solid.
That fresh feel helps you ride with the pack and trust every stop.
Replace Worn Brake Pads and Cables
Even the best brake system can lose its edge over time, so you need to replace worn pads and cables before they start affecting your control. Whenever your pads feel thin, noisy, or glazed, swap brake pads right away so your stops stay crisp and steady.
Should your cable fray, stretch, or stick, replace brake cables before the lever feels mushy or delayed. You’re not just fixing parts, you’re keeping your ride safe and confident.
Clean the area initially, then fit the new parts with care so nothing gets pinched or twisted. After that, squeeze the levers and check for smooth movement and firm bite.
With fresh pads and cables, you’ll feel more connected to your bike and ready for the next ride.
Build a Monthly Brake Check Routine
Now that you’ve swapped out worn pads and cables, keep that same hands-on care going with a monthly brake check routine. You’ll spot small issues before they turn into scary stops, and that keeps you rolling with confidence in the group. Review your weekly riding log so you can match wear to weather, distance, and hills.
- Squeeze each lever and feel for smooth response.
- Check brake lever reach so your fingers land naturally.
- Inspect pads, rotors, and bolts for thin wear, grime, or wobble.
- Clean parts after wet rides, then test both brakes in a safe spot.
If anything feels off, fix it now instead of waiting. That steady habit helps your brakes stay ready for every ride, from easy spins to your toughest climbs.
Frequently Asked Questions
How Often Should Hydraulic Brakes Be Bled?
Bleed hydraulic brakes at least once a year if they use DOT fluid, and every two years if they use mineral oil. If you ride hard or notice a softer lever feel, bleed them sooner. Inspect brake performance regularly so the brakes stay responsive and predictable.
When Should Rotor Thickness Be Replaced?
Replace your rotor when it reaches the wear limit: 1.55 mm for 1.85 mm rotors and 1.7 mm for 2 mm rotors, or sooner if inspection shows damage or warping.
What Causes Brake Pads to Become Contaminated?
Brake pads can pick up contaminants from oily hands, stray lubricant, road dust, grit, or moisture. Once those materials coat the pad surface, they can reduce friction and make braking feel less secure.
How Do I Bed in New Brake Pads?
You bed in new pads by riding hard, then making about ten smooth stops from speed down to walking pace. This pad bedding process helps the pads seat properly and improves braking power for your ride.
When Should Brake Fluid Be Refreshed?
Refresh brake fluid every year for DOT systems and every two years for mineral oil, with shorter intervals if you ride hard. Check fluid age and plan service intervals to keep braking safe and consistent.