A smart bike light setup starts with a bright front light and a clear rear light. Mount the front unit a little higher and point it slightly down so the beam reaches farther without glaring at others. Add flash modes, steady beams, side markers, and bold colors to boost visibility in traffic. Small setup choices can make your ride feel safer and more controlled.
Pick Brighter Front and Rear Lights
Start with the brightest lights you can ride with comfortably, because a smart bike light only helps when people can actually see you. You want strong front and rear lights that fit your route, and the right lumens selection makes that easier.
On dark roads, choose more output so you can see farther ahead and stay seen from behind. In town, you can still pick a bold rear light and a front light with a useful beam range, so you don’t waste power on glare.
Check how the light spreads, not just how bright it sounds. That way, you get steady confidence, better noticeability, and a setup that feels like it belongs on your bike, not pasted onto it.
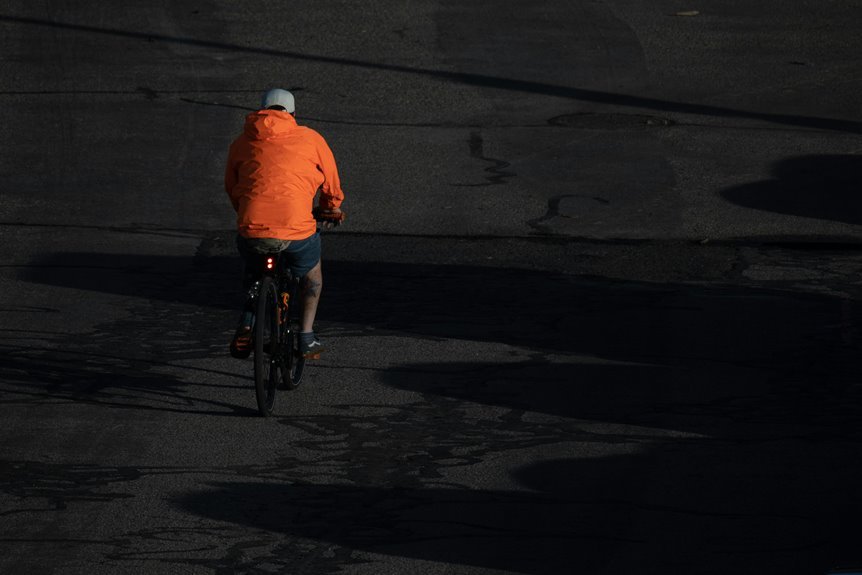
Mount Your Lights Higher for Better Reach
Mounting your lights higher can help the beam travel farther, so you spot the road ahead sooner.
As you place the light above the handlebars, you also cut down on shadows from bags, cables, or your front wheel.
That higher position gives you better distance visibility, which can make night rides feel a lot calmer and safer.
Higher Beam Projection
Whenever you raise a bike light higher on your bike, you usually give the beam a longer path and a cleaner line of sight. That extra height can improve beam throw and road reach, so you can spot potholes, signs, and lane edges sooner. You’ll feel more confident because the light faces less clutter from your wheel, bags, or front cargo.
Keep the mount secure and centered, then test the angle in a dark street. If the beam lands too close, tilt it down a touch; if it fades prematurely, lift it a little. Small changes matter, and you’re not guessing alone. With smart lighting, you and your crew can ride with a clearer, friendlier path ahead, even as the night feels busy.
Above-Handlebar Placement
| Benefit | Why it helps |
|---|---|
| Higher mount | Clears nearby gear |
| Cleaner cockpit | Reduces light block |
| Stable aim | Keeps your setup calm |
| Easy reach | Makes checks simple |
You can pair this setup with a firm bracket, then angle it so your hands and controls don’t shadow the beam. That small change helps you ride with more confidence and less fuss.
Improved Distance Visibility
Riding with your lights set higher can make a real difference whenever you need to see far ahead and be seen sooner.
As soon as you lift a front light from the bar to the helmet or stem, you push the beam over cars, bags, and road clutter. That gives you a longer line of sight, so you catch potholes, curves, and signs earlier. It also helps your group notice you from farther away, which feels good whenever you’re riding together at dusk. If your setup includes motion sensing, the light can still react fast as you speed up.
A rear unit with radar warning works better too, because higher placement clears racks and jackets. You get cleaner coverage, steadier reach, and a safer ride.
Aim Your Bike Lights for Better Visibility
Start with the beam, not just the bike. Once you set your bike lights, check the beam angle so it points where you need it, not into the sky or straight at drivers.
Use wall alignment at home: park five feet from a wall, switch the light on, and adjust the cutoff so the brightest part lands low and steady. Then ride a short stretch and notice whether the road ahead feels clear and calm.
Whenever the light sits too high, you’ll glare at others and lose useful ground detail. Whenever it sits too low, you’ll miss potholes and lane markings. A well-aimed light helps you blend in with your crew, stay seen, and roll with confidence after dark.
Choose Flash Modes That Stand Out
You want flash patterns that pop, so pick a mode that grabs attention without looking random or harsh. In traffic, a faster flash can help drivers spot you sooner, while calmer streets might call for a steadier pattern that still stands out. Match the mode to the scene, and your light works harder whenever it matters most.
Flash Patterns That Pop
As the road gets busy or the light starts fading, the flash pattern you choose can make a big difference in how fast drivers notice you. Pick eye catching sequences that pulse, pause, and repeat in a way that feels lively, not frantic. You want traffic attention modes that stand out without looking messy, so your light sends a clear signal from farther away.
Try a quick double blink, then a steady burst, and see how it feels from the saddle. If you ride with friends, match your light’s rhythm to the group so you all look connected and easy to spot.
Small changes in timing can help you feel safer and more seen, which matters every time you roll out.
Match Mode To Traffic
As traffic gets heavier, the best smart bike light mode is the one that fits the road in front of you. Whenever you ride through busy streets, choose flash modes that stand out without blinding others. A quick pulse works well at intersections, while a steadier blink can help on long, open roads.
Should your light offer route aware alerts, let it shift before crowded turns and junctions. You’ll feel more prepared, and that calm confidence matters whenever you’re sharing space with cars. For rear safety, radar approach cues can trigger brighter bursts as vehicles close in, so drivers spot you sooner.
Match the mode to the moment, and your bike light becomes a teammate, not just a tool.
Keep Your Bike Light Batteries Charged
Smart bike lights work best when their batteries stay ready, because a smart feature isn’t very smart if the light quits halfway home. You belong on the road with gear that keeps up, so build simple battery charging routines and stick to them after every ride. Then check charging cable maintenance, too, because a bent plug or frayed cord can slow you down.
- Plug in your light as soon as you park.
- Use the right charger every time.
- Wipe ports clean before charging.
- Store cables coiled, not twisted.
Whenever your light has an app, check charge levels before you roll out. That small habit helps you ride with confidence, stay seen, and avoid the awkward moment when your bright little teammate goes dark.
Add Reflective Tape to Key Bike Parts
A few strips of reflective tape can make a big difference on your bike, especially after dark or in dull weather.
You can add it to the fork, chainstay, and rear triangle so drivers spot your shape sooner. Reflective frame accents work well because they outline your bike without changing how it rides.
Next, place reflective pedal strips on both sides of each pedal, so every spin creates a bright, moving signal. That motion helps you stand out at intersections and in busy lanes.
You can also check that the tape sticks cleanly around curves and stays visible through puddles and grime. Whenever you ride with a group, these small touches help everyone look connected and easier to notice, which feels good and keeps your crew safer.
Use Helmet and Wheel Lights Together
Once your bike frame and pedals already have reflective tape, you can raise your side visibility even more with adding helmet and wheel lights too. You help drivers spot you from higher and lower angles, and that makes your ride feel more like a team effort. Use helmet light coordination so your head turns send a clear signal, while wheel mounted accent lighting traces motion at street level.
- Place a light on your helmet front or rear.
- Add bright wheel lights on both sides.
- Match colors so your setup looks united.
- Check that everything stays snug and dry.
When your lights work together, you look confident and easy to notice. That simple glow can make you feel part of the road, not concealed on it.
Balance Steady Beams With Blink Patterns
A steady beam gives you a clear, constant anchor, so other road users can judge your position and distance with confidence.
Blink patterns add urgency, but you’ll get the best result if you time them so they catch attention without making your light feel chaotic.
As you mix both modes well, you stay visible in traffic and still look smooth and easy to track.
Steady Beam Safety
Steady beams often give you the calm, constant light you need whenever the road feels busy or rough, but they work best whenever you balance them with blink patterns. You also help riders around you feel steady and informed, not startled. Motion sensing can keep that beam ready when speed changes, while battery efficiency lets you ride longer without worry.
- Keep a steady front beam for clear road reading.
- Add a rear blink so drivers spot you fast.
- Use motion sensing to lift output in active moments.
- Choose battery efficiency settings for long, confident rides.
That mix gives you a friendly, reliable presence on the road. You stay visible, and you fit right in with other careful riders who look out for each other.
Blink Pattern Timing
Whenever you pair a calm steady beam with smart blink timing, your light starts to do more than just glow, it starts to speak for you on the road. You can keep the beam steady whenever traffic feels light, then shift to a sharper flash whenever you need a stronger cue. That rhythm helps drivers notice you without guessing your distance.
Use reactive timing so the light answers changing streets with purpose, not panic. Then match your cadence sync to your speed, since a smooth pattern feels easier to read. You also give your ride a friendly, confident voice that fits in with other riders.
Whenever the road gets busy, a clean blink can help you stand out while still feeling like part of the flow.
Mixed Mode Visibility
Blending a steady beam with a blink pattern gives you the best of both worlds, because you stay visible without looking harsh or chaotic. You can feel part of the night ride crew whenever your light stays calm, then pulses at the right moments. Use these mixed settings to match road mood and traffic flow:
- Keep the front light steady for clear path reading.
- Let the rear light blink to catch quick attention.
- Switch through adaptive sensor modes whenever streets brighten or fade.
- Test app pairing workflows so your custom mix saves fast.
This setup helps you stay confident near traffic, and it also keeps your bike light from shouting all the time. You get a friendlier signal that still grabs eyes, which makes group rides and solo trips feel safer.
Choose Light Colors for Day vs. Night Riding
For daytime riding, choose a light color and flash pattern that cuts through busy streets and stands out fast, because your bike needs to grab attention before drivers even register you. A cool white daytime color temperature with strong bursts usually reads best in sun, haze, and glassy traffic.
You want something that feels bold, not timid, so other riders and drivers notice you as part of the flow. At night, shift to a calmer nighttime beam color that stays bright enough for the road but softer on eyes. That helps you fit in with the group and still claim your space.
Match the color to the setting, then test it on a familiar block. Once it looks clear to you, it’ll feel easier for everyone around you, too.
Add Side-View Lighting for Cross Traffic
Side-view lighting matters because cross traffic often sees you from the side before it sees your headlight or taillight. You can help drivers notice you sooner by adding slim lights along your fork, frame, or wheels. That extra glow makes you feel like part of the group on busy streets, not a shadow at the edge.
- Place small LEDs on both sides of your bike for broader visibility.
- Use turn signal strips on your seat stays or helmet to show lane changes.
- Set intersection alerts to flash brighter when you slow near crossings.
- Choose lights that stay clear in rain and still fit your setup cleanly.
With side lighting, you give drivers a fuller view of you, and that matters when traffic gets crowded.
Test Your Bike Light Setup Before You Ride
Now that you’ve added side-view lights, take a few minutes to test the whole setup before you roll out. You’ll feel more at ease once every light works the way your group expects.
Start with battery check routines, then turn on each light and watch for steady output, flash patterns, and auto-brightness changes.
Next, do pairing verification steps in your app so the front, rear, and side lights stay linked.
Walk your bike, then ride slowly in a quiet area and check that no lamp shifts or dims.
Should something feel off, fix it now, not after dark.
A quick test helps you show up ready, visible, and part of the ride from the initial pedal stroke.
Frequently Asked Questions
How Do I Pair Smart Bike Lights With a Phone App?
Turn on the lights, open the manufacturer’s app, follow the setup prompts, scan for nearby devices, and connect. Keep your phone close, then rename the lights and save your settings.
What Smart Sensors Automatically Adjust Bike Light Brightness?
Your bike light can use ambient light sensors and motion detection to change brightness on its own. It increases output when the surroundings get darker or when you ride faster, and reduces power use when conditions improve.
Can Rear Radar Lights Warn Me About Approaching Vehicles?
Yes, your rear radar light can alert you to vehicles coming up behind you. It uses radar detection to monitor traffic behind your car and provide warnings, helping you stay aware on the road.
How Do I Sync Helmet Lights and Turn Signals Together?
Use the brand app to pair your helmet, lights, and remote, then turn on helmet signal sync and wireless turn coordination. This gives you matched flashes, clearer turn alerts, and a more connected ride.
Which Brands Offer App-Controlled Smart Bike Light Features?
Specialized, See.Sense, Lezyne, and Lumos offer app controlled smart bike lights. Their apps let you adjust lighting modes, install firmware updates, and sync signals for riding.