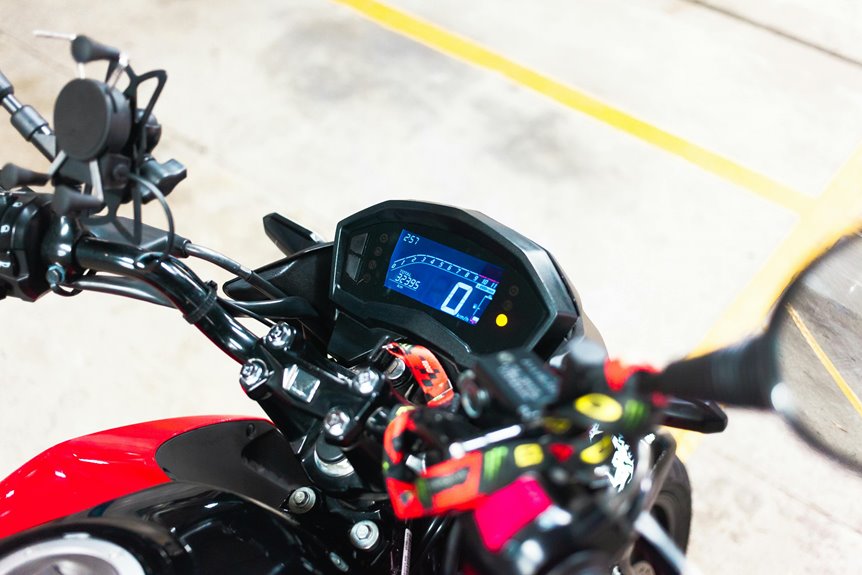

A smart bike speedometer does more than show speed. It keeps your ride data clear and easy to read. A well-placed display helps you check stats without losing focus. Careful sensor setup makes every ride feel smoother and more controlled.
What a Smart Bike Speedometer Shows
A smart bike speedometer shows you much more than just how fast you’re riding. You also see speed readings that help you stay steady, plus odometer totals that track your miles or kilometers over time.
Whenever you glance down, the display can also show trip distance, average speed, and your current ride time, so you always know where you stand. That clear layout makes each ride feel less lonely and more connected, like your bike’s cheering you on.
Some models even show battery level and your chosen units, which keeps setup simple. Because the screen sits on your handlebars, you can check your data fast and keep your focus on the road ahead.
Why Ride Data Matters
Ride data matters because it turns each spin of your pedals into something you can actually understand and use. Whenever you see your speed, distance, and time, you stop guessing and start learning.
That kind of feedback can lift your ride motivation on tired days and keep you moving with purpose. It also gives you progress tracking that feels real, not vague.
- You can spot improvement after each outing.
- You can pace yourself on hard climbs and easy spins.
- You can celebrate small wins with your crew.
- You can notice whenever a ride feels stronger or slower.
Choose the Right Display
You’ll want a display that fits your eyes as well as your handlebars, because screen size can make quick checks feel easy or cramped.
Bright sunlight can wash out a weak screen fast, so look for clear contrast and strong readability outdoors.
And since you ride with gloves, choose controls that respond easily so you’re not fumbling around while you should be focused on the road.
Screen Size Matters
How big should your bike computer screen be? You want enough display real estate to read speed, distance, and time without squinting. A compact interface can still feel roomy if the layout stays clean and the numbers stay bold. When you ride with others, you don’t want to stop and guess your stats.
- Pick a screen you can scan fast while staying in motion.
- Choose larger digits if you share the road or trail with a group.
- Keep extra fields small so your main data stands out.
- Match the size to your handlebars, so the unit feels natural.
If your rides are simple, a smaller screen works well.
If you track more data, choose a bigger one so everything fits neatly and your setup feels like part of the team.
Visibility In Sunlight
In bright sunlight, the right bike display can make the difference between a quick glance and a frustrating squint. You want a screen that stays clear whenever the road turns shiny and the sky feels loud. Look for strong sunlight contrast, so numbers stay sharp instead of fading into gray.
A backlit LCD or bright color screen helps, and an anti glare coating cuts reflections from clouds, trees, and your own helmet. You’ll feel more confident whenever speed, distance, and time stay easy to read without leaning in.
Also, place the display at a slight angle on your bars, because that can reduce washout. Whenever your setup stays visible, you ride with less stress and more ease, like you belong out there.
Glove-Friendly Controls
A good bike display should still listen whenever your hands are cold, wet, or buried in winter gloves. You need winter riding controls that stay easy to trust, because fumbling steals focus and chills your rhythm. Good button ergonomics help you tap, hold, and switch screens without a fight.
- Pick large, raised buttons you can feel fast.
- Check for a clear click, so you know each press worked.
- Choose a layout that keeps speed and trip data one touch away.
- Test the display while wearing your thickest gloves at home.
Whenever the controls fit your hands, you ride with less stress and more belonging on the road. That small ease matters, because every winter mile feels better whenever your gear answers right away.
Mount the Display for Easy Viewing
Mount the display right on your handlebars so you can check your speed without taking your eyes off the road for long. Set it at a slight angle toward you, because a quick glance should feel easy, not awkward.
Then lock it down tight so bumps and rough pavement don’t shake it loose.
Optimal Handlebar Placement
Since you’ll check your speedometer often, place the display where your eyes can reach it fast without pulling you off the road. You want a spot that feels natural, like it belongs on your bike.
- Check handlebar clearance so the unit won’t bump your hands, grips, or brake levers.
- Match the mount to stem compatibility provided that your bars stay crowded.
- Keep the screen centered enough that you can read it without twisting your neck.
- Leave room for lights, bells, or phone mounts you already use.
After you choose the spot, slide the display on and test it while standing over the bike. Should it feels awkward, move it a little. Small changes can make your ride calmer and safer, and that’s a nice win.
Angle For Glanceability
Now that the display sits in a handy spot, the next step is to tilt it so your eyes can catch the numbers with a quick glance. Aim the screen slightly upward as you ride upright, or a bit flatter whenever you lean forward. This angle supports a quick status glance without pulling your focus from the road.
You want the digits to fall into peripheral vision placement, so you notice speed and time while staying relaxed and steady. Test the tilt while seated, then make small changes until the screen feels natural.
Provided that you share your bike with friends, this setup helps everyone feel at home fast. As soon as the display feels easy to read, each ride starts smoother and keeps you connected to your pace.
Secure Vibration-Free Mount
Once the angle feels right, lock the display down so it doesn’t rattle, bounce, or twist while you ride. You want a mount that feels like part of your bike, not a loose gadget waiting to fail.
A firm setup helps you read your stats fast and keeps your group ride rhythm calm.
- Check the clamp and tighten it evenly.
- Add vibration damping pads to soften rough roads.
- Use an anti slip attachment so the unit stays put.
- Shake the bars and test for movement before you roll out.
If you ride with friends, this steady fit helps you stay in the flow and focus on the fun, not on fixing a crooked screen mid-ride.
Connect Speed, Cadence, and Heart Rate Sensors
To get the most out of your smart bike setup, you’ll want to connect the speed, cadence, and heart rate sensors with care, because each one plays a different role in how your ride data comes together. Start with sensor pairing, then wake each device close to the display so it can find the signal fast. Next, lock in heart rate linking by wearing the chest strap or watch snugly, since a loose fit can cause jumpy numbers.
After that, check the cadence unit on your crank and make sure it speaks clearly to the head unit. You’re not doing this alone; these pieces work like a small team beside you. When they connect well, your screen feels steady, and your ride feels more personal and connected.
Set Up Speed, Distance, and Time
With your sensors in place, you can set speed, distance, and time so the display starts giving you useful ride data right away. You’ll feel right at home once the numbers match your ride.
- Hold both buttons to open setup.
- Enter your wheel circumference so speed and distance stay accurate.
- Choose km/h or mph, then set the clock.
- Finish the odometer setup by entering your starting total.
After that, spin the wheel and watch the screen. If the reading looks off, adjust the magnet and sensor until it catches cleanly. Then save your settings and ride.
Your display will track your pace, trip length, and elapsed time with no fuss. That simple setup helps you join every mile with confidence, and it keeps your data ready whenever you roll out.
Add Power and Cadence Metrics
Should your bike computer support more than just speed, power and cadence can turn a simple ride into a much clearer view of how you’re actually riding.
Whenever you add these metrics, you see more than motion. You see effort, rhythm, and control. Power output helps you notice whenever you’re pushing hard or easing off, so you can ride with purpose instead of guesswork. Cadence tracking shows how smoothly your legs spin, which can help you find a pace that feels steady and natural.
Together, they give you a fuller ride perspective and make training feel less lonely, because you’re not just chasing numbers. You’re learning your own pattern. That kind of feedback can build confidence fast, especially whenever the road feels tough and you still want to keep going.
Customize the Screen Layout
Once you’ve added power and cadence, the screen should stop feeling like a plain speed readout and start working like your own ride dashboard.
You can shape it with screen personalization options that match how you ride, so you’re not hunting for data while everyone else rolls on together.
- Pick your main metric foremost, like speed or trip distance.
- Use display page preferences to place power, cadence, and heart rate where you glance most.
- Keep one page for climbs and another for steady road rides.
- Leave out clutter you never check, because your screen should feel like your crew, not a crowded locker.
That simple setup helps you stay calm, focused, and in control. It also makes every ride feel more personal, which is the whole point.
Adjust Backlight and Brightness
Dim the glare so your ride feels calm and easy to read. You can tune the backlight so the display fits your eyes, your route, and the light around you. In bright sun, raise it just enough to keep numbers sharp without draining power.
At dusk, switch to night mode for a softer glow that feels gentle and friendly. Provided that your unit offers a backlight timer, set it so the screen stays lit only as long as you need. That small change keeps the display ready and less distracting.
You’ll also feel more at home on the bike whenever the screen matches your pace. Try a few levels, then choose the one that lets you glance, smile, and keep rolling with ease.
Read Data Safely While Riding
You can keep your eyes on the road by setting your speedometer to show only the most glanceable metrics, like current speed and trip distance. A low-glare screen helps you read data without squinting, even in bright daylight, so your ride stays steady and relaxed.
If your model supports alerts, let it speak up with simple hands-free signals so you don’t need to check the display as often.
Glanceable Metrics
Usually, the best smart bike speedometer is the one that gives you the right details at a quick glance, so you can stay focused on the road instead of staring down at your bars. You want quick glance stats that feel natural, not crowded, and a compact dashboard view helps your eyes land on speed, distance, and time fast.
- Put current speed front and center.
- Keep trip distance easy to spot.
- Show average speed for pacing.
- Add battery level and time for peace of mind.
When you ride with your crew, that simple layout helps everyone feel in sync. You don’t need extra fuss; you need clear signals that support steady effort. With the right screen setup, you read data safely and keep your rhythm without losing your place on the route.
Minimal Screen Glare
While glare washes over your bike speedometer, even a great display can feel hard to trust, so clear screen placement matters just as much as the data itself. You can ease eye strain by angling the unit away from direct sun and keeping it slightly shaded by your stem or bars. A matte screen finish helps soften harsh reflections, and an anti glare coating can make numbers stay readable in bright weather.
You’ll feel more settled when you don’t have to squint for your speed, distance, or time. Should you ride at dawn or dusk, that cleaner view also helps you stay relaxed and confident. Small changes like these keep your cockpit calmer, so your focus stays on the road and the ride you came for.
Hands-Free Alerts
How can you check your ride data without tearing your eyes off the road? You let your smart bike speedometer speak for you. With voice alerts, you hear your current speed, trip distance, or battery status at the right moment. That means you stay connected to the road and to your group. As the trail gets noisy, vibration alerts step in and keep you informed without stress.
- Hear speed changes fast.
- Feel warnings in rough traffic.
- Keep both hands steady on the bars.
- Ride with confidence, even in a pack.
These hands-free cues help you stay aware while you focus on balance, pace, and the riders beside you.
They make each mile feel smoother, safer, and a little more like you belong out there.
Pair GPS and Cycling Apps
Once your bike computer is installed, pairing it with GPS and cycling apps can turn simple ride data into a full training image. Start your GPS pairing setup by opening the app, turning on Bluetooth, and following the device prompts.
Then complete cycling app syncing so your rides show up with routes, distance, and pace in one place. You’ll feel more connected once your stats live where you already plan rides and cheer on friends. Check that the time zone, units, and profile details match, because clean data keeps your progress honest.
Should the link drops, re-pair the device and refresh the app. With that done, your speedometer feels less like a gadget and more like part of your riding crew.
Use Live Feedback to Train Better
As you start using live feedback on your bike computer, you can turn each ride into a smart training session instead of just a trip from point A to point B. You don’t have to guess when to push or ease off, because the screen gives you pacing awareness cues right away.
- Watch current speed to hold a steady effort.
- Use average speed to stay honest on climbs.
- Run live feedback drills on short repeats.
- Adjust your cadence whenever the numbers drift.
With each glance, you’ll feel more connected to your pace and less alone on the road. That steady guidance can calm nerves, build confidence, and help you ride with the group, not behind it. Whenever your display speaks clearly, you can train with purpose and still enjoy the ride.
Fix Common Setup and Sync Issues
When your bike speedometer feels stubborn at setup, don’t worry, because most sync problems come from a few small details you can fix fast. Start with battery sync troubleshooting: open the case, seat the battery firmly, and check for any weak contact. Next, try sensor alignment fixes by lining the magnet with the sensor’s top edge and keeping the gap tiny. Use this quick check:
| Check | Fix |
|---|---|
| Display blank | Reinsert battery |
| No speed | Move magnet closer |
| Weak reading | Tighten sensor |
| Wrong units | Reset settings |
| Random drops | Test cable or wireless link |
Then spin the wheel and watch for a steady response. Should it still slip, reset the wheel size and repeat the pairing steps. You’re close, and your ride crew would call that a solid save.
Get More From Your Speedometer Display
Now that your speedometer is synced and steady, you can start using it for more than basic speed checks. You’re part of a smarter ride while you watch the full screen. Use the data to pace climbs, settle into steady effort, and spot whenever you’re fading. Try these quick moves:
- Check average speed to match your group.
- Use trip distance to judge route progress.
- Review cadence and heart data provided that your model shows them.
- Do a ride memory review after the ride, so you can spot patterns.
Next, tweak battery setup tips provided that the display dims or resets. Small changes keep your screen clear and your confidence up. With a few habits, your speedometer starts feeling like a quiet riding buddy, not just a gadget.
Frequently Asked Questions
How Do I Measure Wheel Circumference Accurately?
Measure wheel circumference by marking the tire, rolling it one full turn, and measuring the distance traveled. For tire calibration, consult standard charts and enter the resulting value.
Where Should I Place the Magnet on the Spokes?
Place the magnet on a spoke so it passes within 0.25 inch of the sensor’s top edge. Accurate alignment keeps speed readings steady and helps ensure reliable performance on every ride.
How Far Can the Sensor Be From the Display?
You can place the sensor as far as 27.5 inches from the display and remain within the signal range. Measure your display mounting distance to confirm proper placement and dependable readings while you ride.
How Do I Reset Odometer Values Before Riding?
Hold both buttons, follow the factory reset steps, and confirm trip memory clearing before your ride. For example, a commuter cleared yesterday’s miles and started fresh, feeling more in control today.
Why Is My Speedometer Not Detecting Wheel Movement?
Your speedometer is likely missing the wheel signal because the magnet and sensor are out of alignment, the battery is low, or the cable is damaged. Check that the gap is about 0.25 inches, secure the mounts, spin the wheel to test it, and if it still does not work, reset the setup and enter the wheel size again.