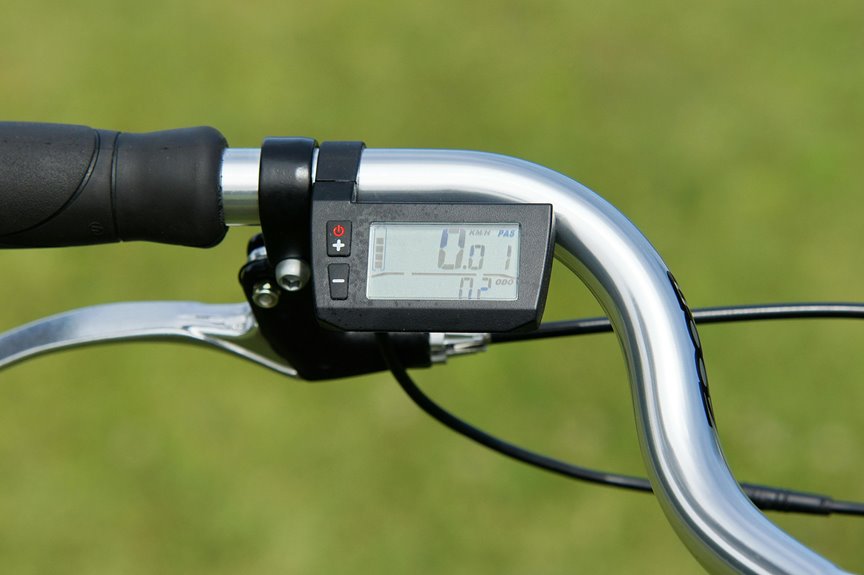

Your smart bike power meter turns every ride into useful training data. Pair the sensor to your head unit through ANT+ or Bluetooth. Check live watts and cadence before you roll out. Then sync the app and set a zero offset so your numbers stay accurate.
Choose Your Smart Bike Power Meter
Whenever you choose your smart bike power meter, start with the head unit and connection type that fit your ride style best, because the right match makes setup feel much easier from the start. You’ll feel more at home once your gear matches your smart bike types, whether you ride indoors, outdoors, or both.
Next, check power meter placement on the pedal, crank, spider, or trainer, since each spot changes how you install and read your effort. Should you want quick moves between bikes, a pedal meter may suit you. Should you want a more fixed feel, crank or spider options can work well.
Keep your eyes on comfort, accuracy, and how your group rides or solo sessions usually flow. That way, you’re choosing with confidence, not guesswork.
Pair Your Power Meter With Your Head Unit
Start while choosing a head unit that matches your power meter, since ANT+ or Bluetooth support makes pairing much smoother. Then wake the power meter while spinning the crank, open your sensor settings, and follow the on-screen pairing steps until the device name or ANT+ ID shows up. Once it’s connected, check that your ride data is coming through clearly so you know your watts are syncing the way they should.
Choose Compatible Devices
How do you make sure your power meter and head unit actually speak the same language? Start with a device compatibility checklist. You need a head unit that supports ANT+ or Bluetooth, and your meter should match that same connection protocol comparison. This simple check saves you from that awkward no-signal moment before a ride.
Next, look at brand notes, because some units handle multiple sensors better than others. If you ride with a smart trainer, watch for shared channel limits, since Bluetooth can lock to one device at a time. ANT+ often feels more flexible for group setups.
Whenever you choose gear that fits together, you join a smoother setup and a calmer start. That means less fuss, more confidence, and more time riding with your crew.
Follow Pairing Steps
Once your devices are compatible, pairing your power meter with your head unit is mostly a calm, step by step job. Start with your initial pairing checklist: wake the meter by spinning the crank, then open sensor settings on your head unit.
From there, choose ANT+ or Bluetooth, and wait for your meter’s ID to appear. If you see more than one sensor, pick the right one so your ride stays in your lane.
Next, finish your head unit language setup and any on-screen prompts before you save the sensor. If your device offers profiles, add the meter to each one you use. That way, you and your setup feel ready together, without the usual pre-ride drama.
Verify Data Transfer
Did the signal really make it through? After you pair your power meter with your head unit, look for live watts, cadence, and a steady sensor icon. When the screen stays blank, wake the crank again and check ANT+ or Bluetooth settings. You’re not troubleshooting alone; every rider hits this snag sometimes. For quick backup verification, use these 3 steps:
- Compare the ANT+ ID on both devices.
- Spin the pedals and watch for changing numbers.
- Save a short ride, then open the file.
That last step gives you transfer confirmation. When the ride shows up, your setup is ready for training. When not, try rescanning and reconnecting the meter in each profile. Once the data moves cleanly, you can trust every workout and ride with your crew.
Calibrate Your Power Meter Correctly
You’ll get better ride data once you start with a proper zero offset calibration, because it resets the meter’s baseline before you push hard.
After that, check for temperature changes, since a cold garage or a sunny road can nudge your readings off target.
Once you make these checks part of your routine, your power numbers stay steadier and your training feels a lot more trustworthy.
Zero Offset Calibration
- Keep the bike still.
- Spin the crank in case needed, then run the zero check.
- Save the result and watch for odd changes.
In case the value looks different from ride to ride, repeat the check. You’ll feel more confident, and your effort will match the plan.
Temperature Compensation Checks
Because power meters can change with heat, temperature compensation checks help you keep your numbers honest as the weather, room, or workout setup shifts.
You’re not alone whenever this feels a little fussy, but it protects the trust you place in your data. After sensor warmup, run a zero-offset or compensation check before you roll. Provided the meter sat in a cold car, near a heater, or on a sunny trainer, temperature drift can nudge readings off target. So give it a few minutes to settle, then check again after a hard spin or long climb. On the occasion that you do this often, your watts stay steady, your zones feel right, and your training group gets the same reliable story from every ride.
Set Up Data Sync in Your App
Once your power meter is paired, set up data sync in your app so every ride lands in one place without extra fuss. Open the app, check app permissions, and allow sensor access, notifications, and background sync. Then turn on cloud backup so your rides stay safe and easy to review later, even when you switch phones. You’re not just saving files, you’re building your training home.
- Confirm the app sees your power meter before you start riding.
- Choose automatic upload so each session moves right after you finish.
- Match your account to Strava, TrainingPeaks, or your club hub should you use one.
After that, you’ll feel more connected to your data and your crew, because your workouts will show up where they belong, ready for the next effort.
Fix Common Sync Problems Fast
In the event that your power meter stops syncing, don’t panic, because most problems have a quick fix. First, wake the meter with a few crank spins, then check that Bluetooth or ANT+ is on in your head unit. If you see more than one sensor, pick the right ID so you stay with your group’s ride setup. Next, restart the app and watch for sync error diagnostics.
If the ride still won’t appear, reopen the manufacturer app and try cloud upload recovery from there. You can also move closer to the bike, replace a weak battery, and re-pair the sensor if needed. A calm reset often brings your data back fast, so you can get back to training with everyone.
Know Which Power Metrics Matter
Now that your sync is steady, you can focus on what the numbers are really telling you. You don’t need every stat to matter. In training analysis, the best power metrics help you spot effort, fatigue, and steady gains without drowning in noise. Start with the few that match your goal and your ride style.
- Use average watts to see your overall effort.
- Check normalized power whenever the ride feels uneven.
- Watch left-right balance whenever one leg feels off.
These power metrics give you a clear story, and that story helps you train with your crew, not beside them. Whenever you know what matters, you feel less lost and more in control. That confidence makes each workout feel like it belongs to your bigger plan, not just another hard ride.
Track FTP, Cadence, and Power Zones
Your power numbers start to make real sense once you track FTP, cadence, and power zones together.
You don’t need to guess where you stand. Start with FTP testing so you can set honest zones that fit your current fitness. Then watch cadence trends during steady rides and hard efforts. If your legs spin too fast, you may waste energy. If they grind too slow, you can fatigue early. Your zones help you ride with purpose, so each session feels clear and doable. You’ll know when to ease off, push on, or hold steady, and that calm structure makes training feel more like a team effort. Keep reviewing these numbers after each ride, because small shifts can reveal where your form, strength, and comfort are growing.
See Whether Your Training Is Working
How can you tell whether the work you’re doing is actually paying off? You watch the small changes that show up over time. As your training progress trends move up, you’re not guessing anymore. You see more steady watts, less fade late in a ride, and better workout adaptation signals after hard days. That can feel reassuring, because you’re not alone in the process. Use your synced data to check these signs:
- Your effort stays smoother across the same route.
- Your recovery feels quicker after tough sessions.
- Your power zones start to feel more controlled.
As the numbers and your legs agree, you’re building real fitness. As they don’t, that’s useful too, since it helps you spot where your body needs a little more care or a lighter session.
Turn Ride Data Into Better Training
Once your ride data lands in one place, you can use it to make smarter training choices instead of just staring at numbers. Start with data storytelling: look for the simple arc in your week, like hard efforts, steady rides, and recovery days. Then let training decision making guide what you do next. If your watts fade early, back off a bit. If your intervals feel smooth, extend them. Check power zones, cadence, and left-right balance to spot patterns you’d miss on feel alone.
When you sync everything into one app, you and your training group can speak the same language and stay on track together. That shared view helps you build stronger sessions, avoid guesswork, and keep progress moving without the guessy guesswork.
Frequently Asked Questions
How Do I Update Power Meter Firmware?
Pair your power meter with the manufacturer app, open the device settings, check for available firmware updates, and follow the on screen prompts to install them. Confirm that your model supports the update first, then sync the meter again and reconnect after the installation finishes.
Can I Pair One Sensor to Multiple Devices?
Yes, but it depends on the sensor’s multi device pairing support and broadcast limits. If it uses ANT+, it can often connect to several devices at once. Bluetooth usually connects to one device, so you may need to choose the device you want to use.
What Affects Bluetooth Connection Range Indoors?
Bluetooth range indoors can shrink when Wi Fi, microwaves, and nearby devices compete for the same airwaves, while walls, furniture, and even your body weaken the signal. Moving closer and reducing obstacles can help keep the connection steadier.
How Often Should I Replace Power Meter Batteries?
Replace your power meter batteries when the battery level starts to drop, which is often every few months to a year. Check the manufacturer’s recommended schedule so your meter stays connected and reliable.
Do Power Metrics Differ Between Trainers and Outdoor Cranks?
Yes, they can differ. Small gaps often come from sensor placement, temperature, and calibration indoors. Focus on trends instead of single watt readings, since exact numbers may not match perfectly.