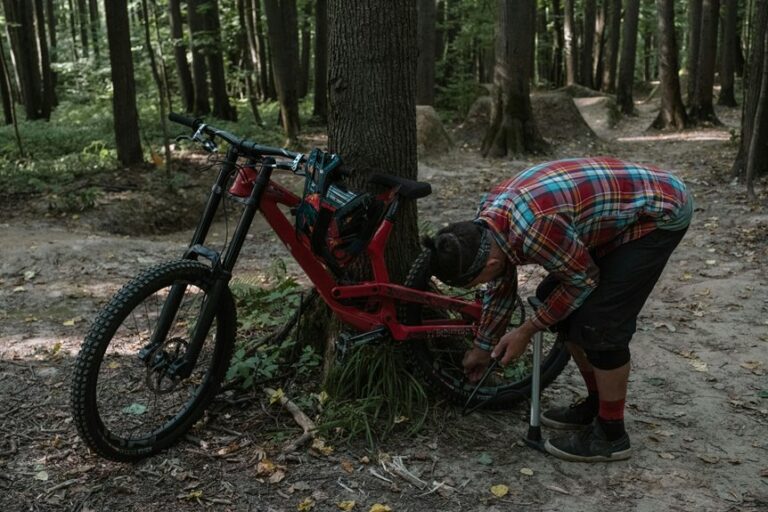
A bike power meter helps you ride with clear, steady effort. It shows your watts right away, so pacing becomes much easier. Heart rate can lag, but power tells the story in the moment. With zones and key metrics, you can train smarter and ride more efficiently.
What Does a Bike Power Meter Measure?
A bike power meter measures the actual force you put into the pedals and turns it into watts, so you can see your effort in real time instead of guessing. You get a clear number for each push, and that helps you ride with more confidence.
With good power meter accuracy, your data stays trustworthy as you train alone or with your group. It also supports pedal force analysis, so you can notice how smoothly you apply power through each stroke.
As you learn what your watts mean, you can match your effort to the ride and feel less lost on hard days. That kind of feedback helps you belong in the flow of structured training, where every pedal stroke has a purpose.
How a Bike Power Meter Compares to Heart Rate
While heart rate tells you how your body is reacting, a bike power meter shows the work you’re actually doing right now, and that difference matters a lot. You can trust power for instant pacing, while heart rate lags and shifts with heat, stress, and sleep. Still, both tools help you ride with more confidence.
- Power gives direct output.
- Heart rate reveals fatigue signals.
- Sensor accuracy keeps your numbers honest.
- Together, they show effort and response.
When you compare them, you stop guessing and start training like you belong in the group that learns fast.
Power tells you what you did on the road. Heart rate tells you what it cost your body. Used side by side, they help you notice drift, recover better, and stay steady when the ride gets tough.
How to Set Your Cycling Power Zones
Setting your cycling power zones starts with one honest number: your current FTP, or Functional Threshold Power. From there, you can do zone calibration by matching each zone to a percentage of that score.
That gives you clear intensity mapping, so every ride feels purposeful, not random. If your FTP rises, your zones should shift too, because your fitness isn’t stuck in one place.
A simple six-zone setup helps you work with your group, whether you’re chasing steady endurance or hard climbs. Use a recent test, then enter the result into your training app or chart.
You’ll get zones that fit your legs today, not last month. That kind of setup keeps you confident, connected, and ready to train with the team.
How to Use Power Data in Workouts
You can use your power zones as a simple guide so each workout target feels clear and purposeful.
Then you can check key metrics like average power, normalized power, and time in zone to see whether you hit the right effort.
From there, you can adjust your training load so you get stronger without piling on too much fatigue.
Setting Power Zones
Because power zones turn raw numbers into useful action, they give your workouts clear purpose and keep guesswork out of the ride. You fit them to your FTP, then use zone calibration to match effort to today’s fitness. That way, your intensity boundaries feel honest, not random.
- Warm-up rides stay easy in Zone 1 or 2.
- Steady endurance work sits in the middle.
- Hard climbs and repeats live near your top zones.
- Recheck FTP often so the zones stay useful.
When you know where each effort belongs, you can join the group ride feeling steady and confident. You’re not chasing everyone else’s pace; you’re riding your plan. That makes training feel calmer, more personal, and a lot more like progress with friends.
Interpreting Workout Metrics
Upon the numbers start rolling in during a ride, they can feel like a secret language, but they don’t have to stay that way.
You read average power to see how steady you stayed, and you watch normalized power while the effort felt choppy. Then compare cadence and heart rate so you can spot workout variability without guessing.
If power stays high while heart rate drifts up, your body might be asking for care. Those are recovery signals, and they matter.
You can also notice while short surges push you off plan, then settle back into rhythm. With practice, these numbers stop feeling cold.
They start feeling like teammates, helping you trust your ride, stay calm, and learn what your legs are saying today.
Adjusting Training Load
As your power data starts to line up with real training stress, the next step is to adjust the load with purpose, not guesswork. You can shape each week around what your legs and lungs actually show, not what you hoped for. That helps you stay with the group and keep building.
- Use load progression planning to raise stress a little at a time.
- Watch recovery response monitoring after hard days.
- Match interval power to your current FTP.
- Ease back whenever TSS climbs faster than you can absorb.
Whenever your numbers stay steady, add work. Whenever they dip, back off and protect your next session.
Power data gives you a clear lane, and that makes training feel less lonely and more like shared progress.
How to Pace Climbs and Time Trials
You can pace climbs better when you hold your threshold power steady instead of chasing every surge, so your legs stay strong all the way to the top.
On a time trial, you’ll want to manage effort from start to finish, using your power meter to avoid going out too hard and fading late.
Whenever you match your power to the course, you ride smarter, waste less energy, and give yourself a real shot at a faster result.
Climb Pacing Strategy
As the road tilts up, power meter data can keep your effort steady instead of letting adrenaline take the wheel. You’ll feel stronger as you pace the initial minutes with calm purpose, then keep your rhythm as the grade bites. Focus on cadence control so your legs stay smooth, and trust your numbers as the climb turns sharp.
On twisty roads, clean corner entry lines help you exit with less wasted speed, so you don’t surge to recover.
- Set a steady target initially
- Breathe before each steep pitch
- Shift before your legs stall
- Stay seated as traction matters
That approach keeps you with your group, and it gives you a real shot at a fast time trial too.
Threshold Power Control
On climbs, you watch your meter and settle just under that line, so you stay strong all the way up. In a time trial, you do the same thing, but you keep your effort smooth and steady from the start. Cadence consistency helps you avoid sudden surges, which can drain you fast. As you stay near threshold, you build fatigue resistance and teach your legs to work hard with less panic. The meter gives you honest feedback, so you can adjust before your breathing gets wild. That steady control helps you feel like part of the strong group that finishes well.
Time Trial Effort Management
Once the road tilts up or the clock starts ticking in a time trial, smart pacing can save your ride. You’re not just chasing speed; you’re protecting power for the moments that matter. Use your meter to settle in early, then build pressure only when your legs and breathing stay steady. That’s effort conservation in action, and it keeps you with the front group, not the parking lot.
- Hold a smooth start for the first minutes.
- Watch your power, not your ego.
- Use a negative split strategy on longer efforts.
- Push harder only when your breathing stays controlled.
On climbs, stay seated when you can and react before spikes hit.
In time trials, aim for even power, then finish strong.
With practice, you’ll feel confident, and your ride team will feel it too.
Which Power Meter Metrics Matter Most
Which power meter metrics matter most whenever you want real progress without guessing? You should start with average power, normalized power, and FTP, because they show what you can really hold. Then watch power zones, since they guide each workout and keep you with the group, not drifting off the back.
Next, use Training Stress Score and load trends to see whether you’re building fitness or piling on too much strain. Heart rate adds another layer, since it shows how your body answers the work. Finally, check power meter data storage so your rides stay organized, and use pedal smoothness analysis to spot how evenly you apply force.
Together, these metrics help you train with confidence, stay connected to your cycling crew, and ride smarter each week.
Common Bike Power Meter Mistakes
Even while your metrics look sharp, small power meter mistakes can quietly skew the whole view.
- You skip zero-offset checks, and meter calibration errors creep in.
- You trust a dirty chain or loose crank arm, and watts drift.
- You save one ride but forget power file backups, so progress disappears.
- You chase every spike instead of steady effort, and your pacing wobbles.
While you fix these habits, your data feels more like your ride crew: honest, steady, and on your side.
Check your setup before you roll, then ride with calm focus. If numbers still look odd, compare a few sessions before you blame your legs. That simple pause keeps you connected to real progress and saves a lot of second-guessing later.
How to Choose a Bike Power Meter Setup
To choose the right bike power meter setup, start with how you actually ride, because the best system is the one that fits your bike, your goals, and your routine.
If you want simple daily use, a crank or pedal meter might feel easiest. If you switch bikes often, pedal meters travel well and keep meter placement flexible. If you care most about how each leg contributes, choose a dual-sided option.
Match the setup to your pedal stroke, fit, and shoe style, too. Then check battery life, weather sealing, app support, and zero-offset speed before every ride.
You’ll train with more confidence whenever the data feels clean and consistent. Whenever your gear fits your habits, you can focus on the ride, not the gadget.
Frequently Asked Questions
How Often Should I Retest FTP During a Training Season?
Retest FTP every 4 to 8 weeks, with the exact timing based on where you are in the season and how your training has changed. In build phases, test more often. In recovery or maintenance phases, you can wait longer between tests and still keep training on course.
What Power Profile Durations Best Reveal My Riding Strengths?
Your power profile is clearest in 5 second, 1 minute, 5 minute, 20 minute, and 60 minute efforts. Short bursts show sprint power, while longer tests reveal climbing strength and threshold endurance.
How Do TSS, CTL, ATL, and TSB Affect Recovery Planning?
TSS measures the stress from each session, CTL tracks longer term fitness gains, ATL shows recent fatigue, and TSB indicates how ready you are to train hard again. Use these values to time intense workouts, insert recovery days, and keep your training aligned with your team.
When Should I Use Heart Rate Versus Power for Fatigue Monitoring?
Use power to control workload precisely. Use heart rate to detect fatigue. If your heart rate rises while the same effort feels harder, your body is under stress. Reduce the load and recover.
Can a Power Meter Help Identify Overtraining Before Performance Drops?
Yes, a power meter can reveal early signs of overtraining before your performance drops. Watch for unusual fatigue, slower recovery, and a higher heart rate at the same wattage. Those changes can tell you to ease up before problems get worse.