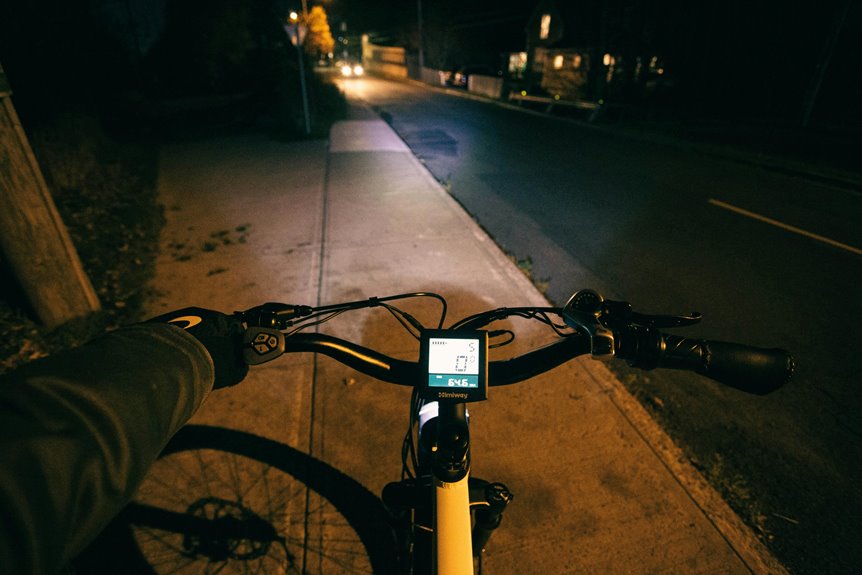

A smart bike light setup needs the right brightness for the road ahead. Brighter settings help on dark streets and rough trails. Lower settings work well in lit areas and save battery. Picking the right level keeps your ride safer and easier to control.
What Smart Bike Light Brightness Means
Understanding smart bike light brightness, you can pick a light that actually fits your ride instead of just guessing and hoping for the best. You’re not just buying more glow; you’re choosing how your bike meets the road. A brighter setting can help if you need a steady beam, while a softer one works if you want to save power and stay comfortable.
With smart light integration, your light can talk to your bike setup and feel easier to use. App controlled presets let you switch modes fast, so you don’t fumble while riding. You can set one option for quick city trips and another for longer paths. That way, your gear feels like part of your crew, not a random gadget.
Why Brightness Matters on Night Rides
When you ride at night, brighter lights help other people see you sooner and give you a clearer view of the road ahead.
That extra light can make you feel calmer because you spot hazards, turns, and signs before they surprise you.
With the right brightness, you don’t just ride more confidently, you ride more safely too.
Visibility For Safer Riding
A good bike light does more than just brighten the road, because it helps you stay visible, read danger sooner, and ride with less stress after dark. You fit into traffic better whenever others can spot you fast, and that calm feeling matters. Bright lights support pedestrian visibility, so walkers notice you sooner at crossings and shared paths. They also work well with reflective accessories, which catch extra attention from cars and riders around you.
- You stand out in busy streets.
- You signal your place on the road.
- You feel more connected to the night scene.
- You help others react with less guesswork.
Whenever your light and gear work together, you ride with more confidence, and that shared sense of safety makes every night trip feel more welcoming.
Brightness And Road Awareness
Because night riding can hide potholes, debris, and sharp turns, your bike light does more than announce you to traffic. It helps you read the road before your wheels do. A steady front beam gives you the confidence to spot edges, lane gaps, and sudden curves, while flashing rear lights keep drivers alert to your presence.
With smart light placement, you can balance visibility and road scanning without wasting power. Aim brighter on dark streets and lower on lit paths, so your eyes stay calm and your mind stays ready.
Whenever the beam reaches far enough ahead, you join other riders who move with less guesswork and more control. That’s the real win: you feel prepared, not startled, even whenever the night feels busy.
Choose Beam Patterns for Roads and Trails
Beam pattern matters just as much as brightness, and the right shape can make your ride feel calm instead of chaotic. You want beam shape choices that match your route, so you’re not fighting glare or blind spots.
For roads, a wider, even spread helps you notice lane edges, parked cars, and sudden movement. For trails, trail spill control keeps light on the path and out of your eyes, so you can track roots and turns with more trust.
- Choose a rounded beam for smooth pavement
- Pick a tighter center for rough singletrack
- Use side fill to read corners sooner
- Match the pattern to your group ride or solo pace
When your light fits the space, you feel more settled, more aware, and more welcome on the ride.
Set Front Light Brightness for Dark Roads
Once your beam shape fits the road, the next step is dialing in the right front light brightness so the dark stretch ahead feels clear instead of harsh.
On unlit roads, start with a steady setting that gives enough light to read road texture and spot potholes without blasting your eyes. Whenever the lane is wide or rural, raise the level until the beam spread reaches the edges of your path. Provided that the pavement is familiar and smooth, drop it a bit to save power and keep the light calm.
You’ll ride more relaxed when the front glow feels even, not glaring. Trust your setup, then adjust for speed, weather, and how alone the road feels.
Adjust Rear Light Brightness for Visibility
You want your rear light angled so drivers can spot you fast without the beam pointing too high or too low.
In night mode, keep the brightness strong enough to stand out, but not so bright that it washes out your signal or drains power too quickly.
A good rear setup helps traffic see your position from a safe distance, which gives you a little more calm on busy roads.
Rear Light Angle
Near the rear of your bike, a small angle change can make a big safety difference. You want your rear light tilt set so the beam sits level with the road, not pointed at the sky or buried at your wheel. That way, riders behind you catch the tail light sweep fast and clearly. A slight downward tilt helps on hills, while a gentle lift works once your bike sits low.
- Check the angle before every night ride.
- Keep the light steady after bumps.
- Share the road with a friend who can spot your glow.
- Recheck the mount after loading bags or a rack.
Once you dial in the angle, you fit in with the night-riding crew and feel safer.
Traffic Visibility Distance
A rear light that’s bright enough for the road behind you can turn a close call into a safe pass. You want drivers to catch your signal distance in advance, so they can move over with room to spare. Start by matching brightness to your riding route. On busy streets, increase output until your visibility range feels clear, not harsh.
Then check from the curb, or ask a friend to ride behind you and report what they see. Also, keep the light steady and aimed straight back, because a clean signal helps traffic read your position fast. Should you ride with a group, sync your rear light so everyone feels easier to spot. That small tweak can make you feel less alone and more protected tonight.
Night Mode Brightness
One well-tuned rear light can make night riding feel a lot calmer, because it helps drivers spot you sooner without blasting the road like a tiny lighthouse.
For night mode comfort, keep your rear light bright enough to stand out, but soft enough to avoid glare behind you. When you ride in mixed traffic, start with a steady low or medium setting, then raise it on darker roads. That simple shift gives you adaptive sleep lighting style control, so your eyes and your group stay relaxed.
- Use flash mode in busy streets.
- Use steady mode on quiet roads.
- Lower brightness in lit areas.
- Increase it in rain or fog.
When you adjust the rear light this way, you fit in with other riders, stay visible, and keep the ride calm without losing your place on the road.
Use Flash, Steady, and Auto Modes
Upon you switch between flash, steady, and auto modes with purpose, your bike light starts working like a smart tool instead of a simple gadget.
Flash mode helps other riders and drivers notice you fast, so use it if you want strong visibility.
Steady mode gives you a calm, even beam, which helps you read the road and feel anchored on darker paths.
Auto mode does the reasoning for you, shifting with changing light so you don’t have to fumble mid-ride.
That’s where light mode timing matters, because the right choice at the right moment keeps your setup smooth.
Smart mode presets can also save time, so you stay focused, confident, and part of the ride instead of fighting your gear.
Match Brightness to Weather and Traffic
As the weather turns messy or traffic gets thick, you need to tune your bike light to the moment, not just leave it on max and hope for the best.
Whenever rain, fog, or glare hits, weather based brightness helps you stay clear without blinding others. In slow streets, use lower steady light. In fast lanes, raise it so drivers spot you sooner. That’s traffic speed matching, and it keeps you in sync with the road around you.
- Fog calls for a softer beam.
- Rain often needs stronger front light.
- Busy streets work better with flashing rear lights.
- Open roads reward brighter steady modes.
You fit in better whenever your light feels like part of the flow. That small change can make your ride feel calmer, safer, and a lot less awkward.
Balance Brightness and Battery Life
You want enough light to see clearly, but you also need your battery to last the whole ride.
Start with the lowest setting that still feels safe, then raise it only when the road gets dark or fast. That way, you keep your vision strong without draining power too soon.
Optimal Brightness Settings
Finding the right brightness setting can make your ride feel safer and a lot less tiring, because a bike light should help you see clearly without draining the battery too fast.
You can choose lower levels in bright city streets, then step up once roads turn dark. This simple habit supports battery optimization and gives you more ride customization.
- Use low or medium in lit areas.
- Switch to steady beams on open roads.
- Save high mode for unlit trails.
- Match brightness to your pace and group.
Whenever you ride with others, you’ll feel more in sync and less rushed. The best setting is the one that fits your route, your eyes, and your crew. That way, your light works with you, not against you.
Battery Life Tradeoffs
As your light gets brighter, your battery usually disappears faster, so the real trick is learning where the sweet spot lives. You want enough glow to feel safe, but not so much that you’re hunting a charger before the ride ends.
For city streets, lower modes often give you the best power management because they stretch runtime while still keeping you visible. Then, as darkness grows or traffic thins, you can step up the beam and save energy until you really need it.
Good charging habits help too, since a full battery lets you start calm, not rushed. Whenever you ride often, keep a routine and match brightness to the route. That way, you stay part of the night-riding crew, not the group pushing home in the dark.
Mount Lights for Better Light Spread
A smart bike light works best whenever it sits in the right place, because mount position changes how far and how wide the beam spreads. You can build a stronger night setup with bar and helmet mounts, since each one covers a different need. The bar throws a broad wash ahead, while the helmet follows your eyes into turns and dark corners.
- Put the main light on the bar for steady reach.
- Add a helmet light for quick line changes.
- Use quick release theft prevention if you park.
- Aim both lights so you feel part of the road.
Whenever you combine them, you ride with more confidence and fit in with other riders who care about safe, smart gear.
Avoid Glare for Drivers and Cyclists
To keep everyone safe, you need to tame your light before it tames the road. Aim your beam a bit lower so it lights your path, not oncoming eyes. That simple move shows driver courtesy and helps your riding crew feel respected too.
| Glare trigger | Safer choice |
|---|---|
| Beam points too high | Tilt it down |
| Full blast in town | Use a softer level |
| Dirty lens | Wipe it clean |
| Wide open aim | Narrow the focus |
When you share the street, glare control matters as much as brightness. You’ll see better, and others won’t flinch or lose their line. Keep your front light steady and set it so the cutoff stays below eye level. Then you ride with confidence, and everyone around you gets a calmer, friendlier night.
Set Up Auto Dimming and Light Sensors
Smart lights can do more than just shine hard, since they can also reason for you in the dark.
You can let ambient light sensing watch the road, then let adaptive dimming control soften or increase your beam without fuss.
That means you stay part of the ride, not chained to the settings menu.
- Keep the sensor clean so it reads smoothly.
- Test the auto mode before your initial night trip.
- Pair it with steady front light for comfort.
- Check that it reacts fast upon you enter shade.
Upon your light shifts with the scene, you fit in with other riders and feel less like you’re blasting the whole street.
That small bit of smart help can make your setup feel friendly, calm, and ready for the group you belong to.
Adjust Brightness for City and Country Rides
If you ride through city streets, you usually need less raw power than you do on dark country roads, so set your front light to match the scene instead of maxing it out every time. In urban brightness zones, a steady 50 to 200 lumens helps you stay visible without washing out signs or blinding riders ahead.
When traffic thins and the road opens, move up in small steps so you don’t jump from dim to harsh. That smooth shift matters because your eyes need time to settle, and your group can keep a calm rhythm together.
On rural routes, stronger beams around 400 to 600 lumens give you better reach. Use countryside lighting transitions to guide that change, and keep your light steady for clearer road detail and a more confident ride.
Test Your Smart Bike Light Setup
Once you mount your lights, you need to test them in the real world, not just in your garage. Ride your usual route at dusk, then check how the beam feels on the road and how well riders near you can spot your rear light. Use app integration to switch modes, then watch for delay or weak response. Next, confirm sensor calibration so automatic brightness changes match tunnels, trees, and streetlights.
- Try steady and flash modes on calm streets.
- Check bar and helmet angles on corners.
- Observe battery use after a short ride.
- Ask a friend whether your light stands out.
That quick run helps you feel confident, and it keeps your setup ready for the group ride you want to join.
Fix Common Brightness Mistakes
A lot of brightness problems start with the beam itself, not the battery, so you’ll want to check whether the light angle actually puts brightness where you need it.
Whether your light sits too low, too high, or too narrow, you can feel like it’s weak even as the lumens are fine.
And since you’ve been running it too dim for dark roads or trails, you’re probably making riding harder than it needs to be.
Overlooking Beam Angles
Why do some bike lights feel bright on paper but still leave the road oddly dim? You could be missing the beam shape, not the power. With beam angle control, you guide the light where your eyes and tires need it most. Light spread tuning helps you widen the pattern for trails or narrow it for streets, so you ride with the group.
- Aim a wider beam for rough paths.
- Tighten the beam for faster pavement riding.
- Raise the light only enough to light ahead.
- Test at night and tweak until shadows soften.
When you match the angle to your route, you’ll see potholes sooner and feel less alone out there. It’s a small setup change, but it can make your night ride feel safer, calmer, and more connected.
Running Lights Too Dim
If your beam angle is already set right but the road still looks muddy, the problem may be simple brightness. You’re not alone, and that’s fixable. Check your mode initially, because low settings save power but can leave you squinting on dark streets. For city rides, aim for 100 to 300 lumens; for rural roads, you’ll want 400 or more. | Mode | Best use | Brightness |
| Low | lit streets | 50-200 |
|---|---|---|
| Medium | mixed roads | 300-600 |
| High | dark routes | 600+ |
Next, confirm sensor calibration so the light reads conditions correctly. Then install firmware updates, since older software can hold back output. Also, clean the lens and fully charge the battery. If your light still feels weak, try a steadier beam or a stronger front unit. You deserve a ride that feels safe, clear, and welcome.
Frequently Asked Questions
How Many Lumens Do I Need for Commuting Versus Trail Riding?
For city commuting, 50 to 200 lumens is usually enough to help you stay visible. For trail riding, aim for 600 lumens or more, with 1000 lumens or higher being ideal for seeing the path clearly. Use a steady beam on trails and a flashing mode in traffic so you can ride more safely.
Should I Choose a Dynamo or Rechargeable Smart Bike Light?
You will likely choose rechargeable lights for adjustable brightness and easier setup, unless you prefer a permanent, always ready system; in a power source comparison, dynamos reduce long term maintenance, while rechargeable lights are lighter and better suited to varied night rides.
Is a Helmet Light Necessary With a Handlebar Light?
No, you do not need a helmet light if your handlebar light already gives strong coverage, but adding one improves where you can see, gives you a backup light, and helps you ride corners with more control and confidence.
What Runtime Should I Expect at Maximum Brightness?
At maximum brightness, expect roughly 1 to 2 hours before battery drain begins to affect performance, and heat from sustained high output can reduce that further. Plan on frequent charging and carry a backup power source if you need longer use.
How Do Quick-Remove Mounts Help Prevent Light Theft?
Quick-remove mounts let you detach your light in seconds, so it is less likely to be stolen when you park. They keep the setup convenient while giving you a simple way to secure the light by taking it with you.